Thursday, January 29, 2009

Crispy Black Bean Tacos

When I saw this recipe on Big City Cooking, I knew it would work perfectly for us since it was quick and flavorful. Then, yesterday, Cara at Cara's Cravings blogged about these and how she baked them instead of fried them to reduce the amount of oil used. I thought that was a great idea, so I followed that path. I also made a few other adjustments to the original recipe, including adding cayenne pepper to the black bean mixture for an added kick. Like Cara, mine made 6 tacos instead of the 4 that the original recipe yields.

These were really delicious. The cayenne contrasted nicely with the cool tanginess of the lime and feta coleslaw. I promise you won't even miss the meat!

Crispy Black Bean Tacos
adapted from: Bon Appetit via Big City Cooking and Cara's Cravings

Ingredients
2 cups cooked black beans
1/2 tsp cumin
1/2 tsp garlic powder
1/2 tsp cayenne
2 tsp olive oil
1 lime, juiced
2 c. coleslaw mix
2 green onions, green part only
1/3 c. cilantro, chopped
6 corn tortillas
1/2 c. feta cheese
Hot sauce or salsa to top (optional)

Preparation

Preheat oven to 425-degrees F.

Place beans, cumin, cayenne, and garlic powder in bowl and partially mash. In a separate bowl combine coleslaw mix, green onions, cilantro, lime juice, and 2 tsp oil. Season with salt and pepper.

Place bean mixture in tortillas and place tacos on a baking sheet. Bake in the oven for 15 minutes or until tortillas are crispy. Remove from sheet and stuff with feta and coleslaw mixture. Serve immediately. (If you want some more heat top with hot sauce or salsa.)

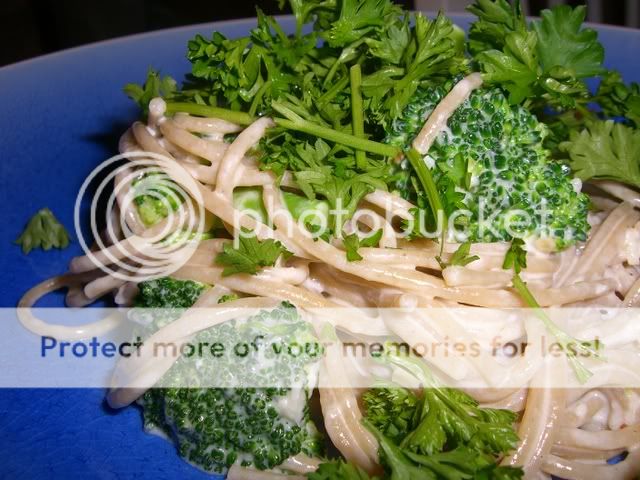
Pasta with Roasted Garlic Cream Sauce and Broccoli

Now, this is by no means low-fat or low-calorie, but I figure if I'm going to eat something indulgent, I'm better off making it at home where I know what goes into it and where I can control the portion size. The roasted garlic adds so much to this cream sauce. I love the distinctive sweet flavor, and I get quite a bit of pleasure from squeezing the roasted cloves out of their papery skin. If you roast the garlic before hand, this recipe takes practically no time to put together, and roasting the garlic doesn't take too terribly long to begin with.

Roasted Garlic Cream Sauce
source: Elizabeth's Cooking

Ingredients
1 head garlic, roasted (instructions to follow)
Olive oil
1 cup cream or half & half
2 TBSP milk
1-3 TBSP butter
1 clove garlic, minced
dash salt
1/8 tsp pepper
1/2 cup freshly grated Parmesan cheese
Red pepper flakes, optional
Pasta (This made enough sauce for about a half package of pasta.)

DIRECTIONS
Preheat oven to 450 degrees F.

Cut the garlic head in half (you should have a top and bottom half, not a left and right side). Place each half on a sheet of tin foil. Drizzle with olive oil and sprinkle with salt & pepper. Bake for about 25 minutes. Remove from oven, let sit about 5 minutes, and then open the tin foil to let the garlic cool.

Meanwhile, cook the pasta to al dente. Drain & set aside. (I put the pasta in while the sauce was coming to a boil and threw in cut-up broccoli florets for the last few minutes of the pasta cooking.)

In a medium skillet, combine cream, milk, butter, minced garlic, and salt & pepper. Thicken by whisking in about 2 tsp flour, if necessary. Bring to just boiling. Reduce heat to low. Add cheese and whisk till smooth. If sauce is too thick, add some stock (chicken or veggie) or some more milk.

Now, squeeze the garlic out of the paper-y skin. The bottom half should take a bit more work than the top. They should just sort of fall out of the top with just a little squeeze from the top. You might have to dig a little on the bottom. Mash with a metal potato masher or the back of a fork. Add to the cream sauce and whisk together. Cook for about 2 minutes, stirring occasionally. Sprinkle with red pepper flakes.

Serve over pasta. Sprinkle with more red pepper flakes (I added parsley as well) to taste.

Tuesday, January 27, 2009

Light Buttermilk Pancakes with Blueberries

These are the best pancakes I have ever had outside of Pancake Pantry here in Nashville. This recipe makes the lightest, fluffiest pancakes, and the buttermilk contributes such a rich flavor. I threw in some frozen blueberries that I had in the freezer and served these with some turkey bacon for a Sunday morning breakfast that didn't break the calorie bank but still felt indulgent. I did have a slight problem with the pancakes cooking all the way through. They get so puffy that it's hard to tell when the inside is cooked, so leave them on a little longer than you might normally.

Light Buttermilk Pancakes
source: Cheap Healthy Good
Makes 8-10 pancakes

Ingredients
1 cup all-purpose flour
2 tablespoons sugar
1 teaspoon baking powder
½ teaspoon baking soda
1/4 teaspoon salt
1 cup low-fat buttermilk
1 teaspoon vegetable oil
1 large egg, lightly beaten
Cooking spray
(I added about a 1/2 cup of frozen blueberries.)

1) Lightly spoon flour into a dry measuring cup; level with a knife. Combine flour and next 4 ingredients (flour through salt) in a large bowl, and make a well in center of mixture. Combine buttermilk, oil, and egg; add to flour mixture, stirring until smooth.

2) Spoon about 1/4 cup batter onto a hot nonstick griddle or nonstick skillet coated with cooking spray. Turn pancakes when tops are covered with bubbles and edges look cooked

Sunday, January 25, 2009

Black Bean Burrito Bake

I'm thinking about giving up meat for Lent this year, so I'm trying to work up a repertoire of vegetarian meals that won't bore me to death. Mexican dishes are always fine by me, and this has been in my recipe queue for about a month now. This was good and simple to throw together. You will most likely have these ingredients at home (or at least I do!), and I always appreciate recipes that don't have ingredient lists a mile long.

The filling is a little bland. Next time I'll add a little cumin or garlic powder. The quality of salsa that you use will also affect this recipe. I prefer spicier salsa, so I used Trader Joe's Chipotle Salsa. If you like things on the more mild side, you might only use half a chipotle en adobo pepper.

Black Bean Burrito Bake
source: Cheap Healthy Good

Ingredients

1 chipotle chile in adobo sauce
1/2 cup reduced-fat sour cream
1 (15-ounce) can black beans, rinsed, drained, and divided (I used 2 cups of soaked and cooked dried beans.)
1 cup frozen whole-kernel corn, thawed
4 (8-inch) flour tortillas
Cooking spray
1 cup bottled salsa
1/2 cup (2 ounces) shredded Monterey Jack or cheddar cheese

1) Preheat oven to 350°.

2) Remove one chile from can. Chop chile. Reserve remaining adobo sauce and chiles for another use. Combine sour cream and chile in a medium bowl; let stand 10 minutes.

3) Place half of beans in a food processor; process until finely chopped. Add chopped beans, remaining beans, and corn to sour cream mixture.

4) Spoon 1/2 cup bean mixture down the center of each tortilla. Roll up tortillas; place, seam side down, in an 11 x 7-inch baking dish coated with cooking spray. Spread salsa over tortillas; sprinkle with cheese. Cover and bake at 350° for 20 minutes or until thoroughly heated.

Saturday, January 24, 2009

Dinner Divas: Baked Gruyere and Sausage Omelette

The second recipe I picked for Dinner Divas was this Baked Gruyere and Sausage Omelette from Giada de Laurentiis. I liked that it didn't require a bunch of ingredients that I wouldn't normally have at home, and I like that you could have this for breakfast, brunch, lunch, or a light dinner. It was definitely more like a crustless quiche than an omelette. I couldn't taste the gruyere very strongly and would use a less expensive cheese like swiss to make this next time. My changes are in italics below.

Baked Gruyere and Sausage Omelette
source: Food Network

Ingredients
Butter, for greasing dish (I used cooking spray.)
2 tablespoons olive oil
1 small onion, diced
1/2 pound mild turkey sausage, casings removed (I used a half pound of pre-cooked sweet Italian chicken sausage sliced thinly.)
8 large eggs
1/3 cup whole milk (I used 1% milk.)
1 teaspoon kosher salt
Freshly ground black pepper
1 red bell pepper, diced
1 1/2 cups (4 ounces) grated Gruyere cheese
1/4 cup plus 2 tablespoons chopped fresh flat-leaf parsley

Directions

Preheat the oven to 425 degrees F. Lightly butter an 8 by 8-inch baking dish.

Heat the oil in a medium skillet over medium-high heat. Add the onion and cook until translucent, about 3 minutes. Add the sausage and cook until brown, about 5 minutes. Set the pan aside to cool.

In a large bowl, whisk together the eggs, milk, salt and pepper, to taste, until smooth, about 20 seconds. Add the red bell pepper, 1 cup of Gruyere cheese and 1/4 cup of parsley. Stir in the onion mixture. Pour the batter into the prepared pan. Sprinkle with the remaining cheese. Bake for 20 to 25 minutes or until golden brown. (Mine took slightly longer to bake.)

Cut the baked omelet into wedges and sprinkle with remaining parsley before serving.

Cook's Note: To make individual servings, divide the batter between 4 buttered 8-ounce ramekins. Bake for 15 to 18 minutes.

Chunky Everything Blondies


The whole point of making these blondies for Joe's birthday was because they had toffee in them, but after we had polished off the pan of them, I realized that I had forgotten to put the toffee chips in! So I'm going to have to make these again in the near future and remember to put the toffee chips in.

Otherwise, these were absolutely delicious blondies. They tasted a lot like bar cookies, which I wasn't that surprised about because the dough texture was very similar to a drop cookie dough. I halved the recipe and baked it in an 8x8 pan. This was my first Dorie Greenspan recipe, and I have to way it turned out perfectly!

Chunky Everything Blondies
source: Noodle Nights and Muffin Mornings

Ingredients
2 cups all-purpose flour
3/4 teaspoon baking powder
1/2 teaspoon baking soda
1/2 teaspoon salt
2 sticks (8 ounces) unsalted butter, at room temperature
1 1/2 cups (packed) light brown sugar
1/2 cup sugar
2 large eggs
1 teaspoon pure vanilla extract
6 ounces bittersweet chocolate, chopped into chips, or 1 cup store-bought chocolate chips
1 cup Heath Toffee Bits
1 cup coarsely chopped walnuts
1 cup sweetened shredded coconut

Directions

Preheat oven to 325 degrees.

Butter a 9×13-inch baking pan and put it on a baking sheet.

Whisk together the flour, baking powder, baking soda and salt.

Working with a stand mixer, preferably fitted with a paddle attachment, or with a hand mixer in a large bowl, beat the butter on medium speed until smooth and creamy.

Add both sugars and beat for another 3 minutes, or until well incorporated.

Add the eggs one by one, beating for 1 minute after each addition, then beat in the vanilla.

Reduce the mixer speed to low and add the dry ingredients, mixing just until they disappear into the batter.

Using a rubber spatula, stir in the chips, nuts and coconut.

Scrape the batter into the buttered pan and use the spatula to even the top as best you can.

Bake for about 40 minutes, or until a knife inserted into the center of the blondies comes out clean. The blondies should pull away from the sides of the pan a little and the top should be a nice honey brown.

Transfer the pan to a rack and cool for about 15 minutes before turning the blondies out onto another rack.

Invert onto a rack and cool the blondies to room temperature right side up.

Cool for at least 4 hours to make sure chocolate is cooled and bars cut clean.

Joe's Birthday Dinner

Because I had class on Tuesday until 7 pm, Joe's birthday dinner needed to be something nice that could be on the table relatively quickly. Since we rarely eat steak, it definitely felt like a special occasion. I pan-fried the steaks in my cast iron frying pan after rubbing in some steak seasoning.

The roasted brussel sprouts are our new favorite thing. I tossed halved brussel sprouts in some olive oil, used salt and ground pepper generously, and roasted them in a 400-degree oven for about 30 minutes, tossing occasionally to prevent them from sticking to the pan.

The baked potatoes were actually microwaved and turned out perfectly in a quarter of the time it would've taken to bake them. All in all, a very successful weeknight dinner that was also special!

Monday, January 19, 2009

Spicy Pork Po-Boys

Occasionally I pick up a bunch of ground pork at the grocery store on manager's special, so I had bookmarked this recipe for one of those times. Like I said, I love sandwiches, so this seemed perfect for a relatively quick meal. I skipped the instructions for the spread and just used mustard and mayonnaise. I also don't have a grill pan, so I just cooked them in a skillet. I also halved the recipe to only make two sandwiches.

I loved the spiciness of the pork patties. When Joe took the leftovers to the hospital for dinner, he said that everyone was asking him what he was eating and where he got it, so I guess it smells pretty good also!

Spicy Pork Po-Boys
source: Liz's Cooking Blog

Ingredients
  • 1 1/2 pounds ground pork
  • 1 1/2 teaspoons paprika
  • 1 1/4 teaspoons dried thyme
  • 3/4 teaspoon cayenne pepper
  • 3/4 teaspoon garlic powder
  • Kosher salt and freshly ground black pepper
  • 1/2 cup mayonnaise
  • 1 1/2 tablespoons Dijon mustard
  • 2 medium kosher dill pickles, very finely chopped
  • 1/2 small shallot, minced
  • Four 8-inch soft baguettes, split
  • 2 cups shredded iceberg lettuce (I used green leaf lettuce.)
  • 2 tomatoes, thinly sliced
  • Hot sauce, for serving

Instructions:
  1. Preheat a grill pan. In a large bowl, using your hands, mix the ground pork with the paprika, thyme, cayenne pepper, garlic powder, 1 1/2 teaspoons of kosher salt and 1/4 teaspoon of black pepper. Form the pork into twelve 1/2-inch-thick patties. Grill the pork patties over moderate heat, turning once, until they are cooked through, about 8 minutes total.
  2. Meanwhile, mix the mayonnaise with the Dijon mustard, pickles and shallot and season with salt and pepper. Spread the mayonnaise on both sides of the baguettes.
  3. Place 3 pork patties on the bottom of each baguette and top with the lettuce, tomato and a few splashes of hot sauce. Close the sandwiches and serve.

Soba Salad with Feta and Peas

As a 21st-century woman living in the South, my life is often a study of contrasts. I lift weights while listening to gospel bluegrass, and last night I realized I was eating soba salad with feta and peas while listening to Merle Haggard and writing a paper on the impact of the Black Plague on personal piety. I had also been in quite a funk, and this dish may have actually lifted me out of it since it seems to have restored my appetite and mood.

I kept returning to this recipe on Bridget's blog, and I finally put it on my meal plan for this week. It is so good and takes practically no time to make. I could and will be eating this for days. The taste of the soba noodles and the feta and the lemon and the soy sauce is so interesting and complex that I completely forgot to add the green onions. I don't think I'm going to tell Joe how good it is because I want all the leftovers for myself! I just cannot say enough good things about this. Go make it for yourself!

Soba Salad with Feta and Peas
source: The Way the Cookie Crumbles
Yields 4 to 6 servings

Ingredients
1 (10- to 12-ounce) package soba noodles
1 (10-ounce) package frozen baby peas
3 tablespoons olive oil
2 tablespoons fresh lemon juice
2 teaspoons soy sauce
1 teaspoon sugar
¾ teaspoon salt
¾ teaspoon black pepper
6 oz feta, crumbled (¾ cup)
4 scallions, finely chopped

Preparation

1. Cook noodles and peas together in a 6- to 8-quart pot of lightly salted boiling water until noodles are tender, 4 to 6 minutes.

2. While noodles cook, whisk together olive oil, lemon juice, soy sauce, sugar, salt, and pepper in a large bowl.

3. Drain noodles and peas well in a colander, then rinse under cold running water to stop cooking. Drain well again, then add to dressing along with feta and scallions. Grind more black pepper to taste over salad.

Saturday, January 17, 2009

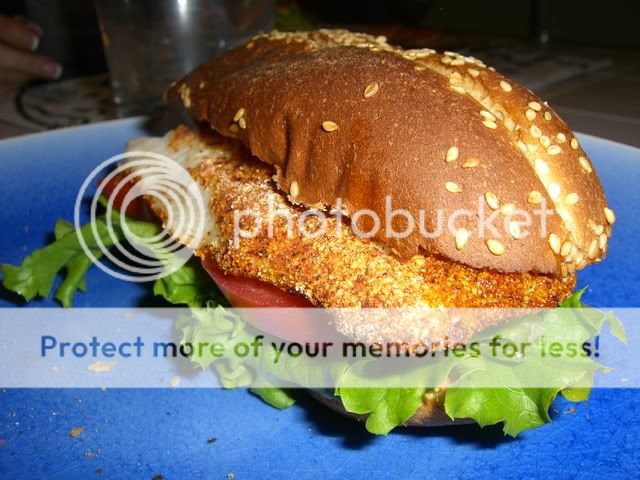
Cornmeal Crusted Catfish Sandwiches with Lime Butter

I absolutely love sandwiches. In fact, I would even say that a good sandwich ranks highly on my list of all-time favorite foods. When my parents informed me that they were coming over for dinner on Wednesday before the Vanderbilt basketball game, it was easy for me to double the amount I was planning to make.

These sandwiches turned out deliciously. The catfish had just enough crunch and spice while still being healthy. I have to admit that I couldn't taste the lime butter and would probably just use light mayonnaise on these next time. The original recipe calls for tilapia, so any mild white flaky fish would work. I just love the taste of fried catfish without all the calories!

I served these with roasted sweet potato rounds, but Joe was asking for coleslaw, which would go great with these sandwiches.

Cornmeal Crusted Catfish Sandwiches with Lime Butter
adapted from Cooking Light

Ingredients
  • 3 tablespoons yellow cornmeal
  • 1 tablespoon chili powder
  • 1 teaspoon ground cumin
  • 1/2 teaspoon salt
  • 1/8 teaspoon ground red pepper
  • 4 (6-ounce) catfish fillets
  • Cooking spray
  • 2 tablespoons butter, softened
  • 1 teaspoon grated lime rind
  • 1/2 teaspoon fresh lime juice
  • 4 (1 1/2-ounce) whole wheat hoagie rolls
  • 4 (1/4-inch-thick) slices tomato
  • leaf lettuce for 4 sandwiches
Preparation
  1. Preheat broiler.
  2. Combine first 5 ingredients in a shallow dish or pie plate, stirring to combine. After coating both sides of fillets with cooking spray, dredge them in the cornmeal mixture.
  3. Coat a broiler pan with cooking spray and place fish on the pan. Broil fish for 10 minutes or until fish is opaque and flakes easily with a fork.
  4. Combine butter, lime rind, and lime juice in a small bowl, stirring well.
  5. Spread butter on top half of rolls. Place fillet, tomato slice, and lettuce on the bottom half. And close sandwiches.

Ma Po Tofu


I've been wanting to make Ma Po Tofu for quite some time now, and when I realized I had both ground pork and tofu in the refrigerator waiting to be used, I knew it was the perfect time. Because Joe had started the tofu draining while I was on my way home and because I used leftover rice from another dish, I had dinner on the table within 30 minutes, just in time for our favorite (and only) TV show, Scrubs.

And it was SO good. I love how the texture of the meat off-set the creamy texture of the tofu. I added in some broccoli for some color and as a vegetable. I will definitely be making this again.

I'm also submitting this dish to Joelen's Wine & Dine: Chinese New Year Adventure.

Ma Po Tofu
adapted from: Cooking Light

Ingredients
  • 1 (1-pound) package reduced-fat firm tofu, cut into 6 slices
  • 1/2 cup fat-free, less-sodium chicken broth
  • 1 tablespoon cornstarch
  • 2 tablespoons low-sodium soy sauce
  • 1 tablespoon oyster sauce
  • 1 tablespoon chili garlic sauce (You can moderate the heat to your own taste.)
  • 4 ounces lean ground pork
  • 1 tablespoon grated peeled fresh ginger
  • 3 garlic cloves, minced
  • 2 cups hot cooked long-grain brown rice
  • 1/3 cup chopped green onions
  • 2 small heads of broccoli
Preparation
  1. Drain slices of tofu between paper towels, pushing down occasionally or weighting down with a dinner plate for 30 minutes. Discard paper towels and slice tofu into 1/2 inch cubes.
  2. Combine broth, cornstarch, soy sauce, oyster sauce, and chili garlic sauce and whisk together.
  3. After heating a large skillet over medium-high heat, add the ground pork and cook until no longer pink, about 4 minutes. Add ginger and garlic and cook for about 1 minute. Add tofu and broccoli, cooking until tofu is golden-brown and broccoli is bright green, stirring frequently. Add broth mixture to pan. Bring to a boil, then turn down the heat and let simmer for a few minutes until thickened. Remove from heat.
  4. Serve over rice and sprinkled with onions.
Yield: 4 servings

Wednesday, January 14, 2009

Dinner Divas: Creamy Spinach and Mushroom Enchiladas

I was lucky enough to pick out some of the recipes for Dinner Divas this month, and my first thought was to find a recipe for a lightened version of something that usually isn't that light. When I normally order spinach enchiladas at a restaurant, they usually come swimming in a cream sauce. I am definitely trying to watch what I eat after the holidays, so I appreciate a recipe that feels good on my tongue and in my mouth but that doesn't land on my hips afterward.

Joe was a big part of making sure this dinner got on the table because I suddenly didn't feel too well and had to lie down in the middle of making dinner. These were a great dish for leftovers, though I would've preferred a little more spice in the spinach and mushroom mixture. It was a good weeknight meal too and came together easily.


Creamy Spinach and Mushroom Enchiladas

adapted from Cooking Light

Ingredients

Sauce:
1 teaspoon garlic powder
1 (10-ounce) can condensed reduced-fat cream of mushroom soup, undiluted
1 (8-ounce carton) fat-free sour cream
1 (4.5-ounce) can chopped green chiles, undrained

Enchiladas:
Cooking spray
1 cup chopped onion
1 jalapeño pepper, seeded and chopped
2 cups sliced mushrooms
1 teaspoon garlic powder
1 teaspoon ground cumin
1/2 teaspoon salt
2 (10-ounce) packages frozen chopped spinach, thawed and drained
1 cup (4 ounces) shredded Monterey Jack cheese, divided
10 (6-inch) corn tortillas

Garnish:
1/2 cup chopped seeded plum tomato (I omitted.)
1/4 cup chopped green onion tops

Preparation

Preheat oven to 350°.

To prepare sauce, combine first 4 ingredients; stir well.

To prepare enchiladas, heat a large nonstick skillet coated with cooking spray over medium-high heat. Add onion and jalapeño; sauté 5 minutes or until tender, stirring frequently. Add mushrooms; sauté 3 minutes or until tender. Stir in garlic powder, cumin, salt, and spinach; cook 5 minutes or until heated. Combine spinach mixture and 1/4 cup cheese in a large bowl; stir to combine.

Spoon 1/2 cup sauce into a 13 x 9-inch baking dish coated with cooking spray. Warm tortillas according to package directions. Spoon about 1/3 cup spinach mixture down center of each tortilla; roll up. Place filled tortillas seam sides down in the baking dish. Spread remaining sauce evenly over tortillas; top with 3/4 cup cheese.

Bake at 350° for 20 minutes. Top with tomato and green onion.

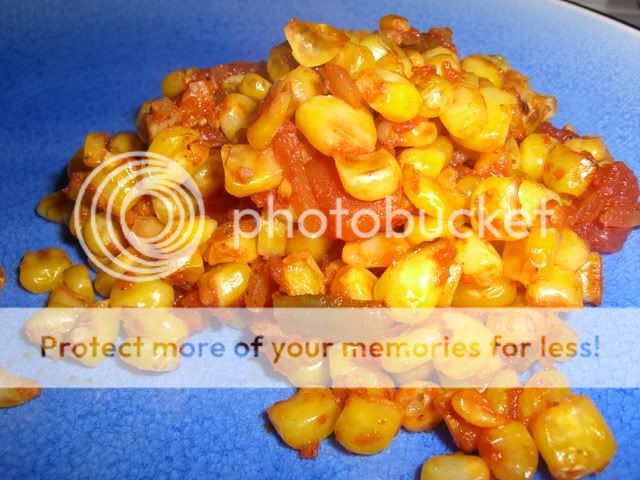
Sauteed Corn and Salsa

Most of the time when I make Mexican food, I don't have a lot of energy or time to put into side dishes, and cans of refried beans kind of gross me out. So this was the perfect option for a quick healthy side dish to go with the enchiladas I made Monday night. I could throw it together while the enchiladas were in the oven. Browning the corn really brought out its sweetness which was nicely balanced by the heat and smokiness of the salsa I used.

Sauteed Corn and Salsa
source: Everyday Food via Cooking This and That
Makes 2 servings

Ingredients
1 tablespoon olive oil
1 clove garlic, minced
10 ounce package frozen corn, about 2 cups
1/3 cup jarred salsa or 1/2 cup fresh salsa
kosher salt and coarse ground black pepper
1 tablespoon fresh chopped chives and/or cilantro

Heat olive oil in medium saute pan over high heat. Add corn and garlic, cook until corn begins to brown, stirring occasionally, 5-10 minutes.Remove from heat and add salsa and salt and pepper to taste. Top with chives or cilantro.

Thursday, January 8, 2009

Easy Sausage "Gumbo"

One of my favorite ways of making sure we get all of our vegetables in the winter without it costing an arm and a leg is to use packages of frozen vegetables. Often they are flash-frozen at their peak without a lot of additives like sodium and other preservatives. At our Kroger, they also conveniently have packages called Recipe Beginnings with frozen stir-fry vegetables, mirepoix, and vegetable soup vegetables. When I saw this Recipe Beginnings with gumbo vegetables, I immediately picked one up knowing it would be a super-easy weeknight meal with the addition of some pre-cooked sausage.

Easy Sausage "Gumbo"

Ingredients

1 14.5 can diced tomatoes
16 oz pre-cooked sausage, sliced (I used Hillshire Farms Spicy Chipotle Sausage)
1 package Recipe Beginnings Vegetable Gumbo Mix (contains okra, corn, onion, celery, and red bell pepper)
Cajun seasoning and Tabasco Sauce to taste
2 cups cooked brown rice

Preparation

Heat a Dutch oven or large pot over medium-high heat. Cook sausage in pot until heated through and browning. Add the tomatoes and vegetable mix to the pot, adding Cajun seasoning to flavor. Bring to a boil and then reduce to a simmer for 25-30 minutes. Taste occasionally and add Cajun seasoning or Tabasco sauce as desired. Serve over brown rice.

Yield: 4 servings

Pasta with Prosciutto and Spinach

This meal was so easy even Joe was amazed and so good that the 4 servings turned into two. I put the chopped up prosciutto in with the garlic to allow it to heat up and crisp up a little bit. If you're looking for a < 30-minute meal, this is the ticket. I also omitted the pignolis because I failed to pick them up at the store. I'm sure they would add a whole other dimension to the dish!

The other bonus was that I used the rest of the prosciutto to make a prosciutto and Brie sandwich on homemade French bread for lunch the next day.

Pasta with Prosciutto and Spinach
source: Sweet Savory Southern

Ingredients

1 (9-ounce) package fresh cheese tortellini (such as DiGiorno)
1 tablespoon pine nuts (I omitted)
1 teaspoon olive oil
6 large garlic cloves, finely chopped
1 (6-ounce) package fresh baby spinach
1/4 cup (1 ounce) preshredded Parmesan cheese
1/4 teaspoon black pepper
2 ounces prosciutto, thinly sliced

Preparation

1. Cook pasta according to the package directions, omitting salt and fat; drain. Transfer pasta to a large bowl.
2. Heat a large nonstick skillet over medium heat. Add nuts to pan; cook 1 1/2 minutes or until toasted, stirring occasionally. Add nuts to bowl.
3. Heat oil in pan over medium heat. Add garlic to pan; cook 2 minutes, stirring occasionally. Add spinach to pan; cook 2 minutes or until spinach wilts, stirring constantly. Add spinach mixture, cheese, and remaining ingredients to bowl; toss well.

Sunday, January 4, 2009

7 Interesting Facts About Me

I've been tagged by a couple of people to complete this meme, namely Erin at Erin's Food Files and Kristen at Le Petit Pierogi, so I suppose I'd better do it.

1. I'm currently in the process to be ordained an Episcopal priest, which is why I went back to school to get my M. Div. It was pretty complicated just to get to this point and involved several bishops in Tennessee and Texas.

2. I got my Bachelors of Music degree in vocal performance and performed the role of Hansel in Humperdinck's Hansel and Gretel when I was a junior in college.

3. My senior year of high school I had to write a paper/story about my life up to that point and continue it to my death in the future. In the paper, I ended up marrying a jazz pianist. In real life, I ended up marrying a jazz pianist who also happens to be a doctor (but I was more interested in the jazz pianist part).

4. I went to a boarding school for the arts in Michigan for the last two years of high school.

5. I'm taking Koine Greek in school to read the New Testament in its original language.

6. Joe and I are planning not to have kids due to our demanding careers and our desire to be able to spend time together with our time off and travel.

7. I have a weakness for pure-bred cats with which I've infected Joe. I grew up with Maine Coon cats, and now we have two Ragdolls.

I don't want to tag anyone and force them to do this, so if you feel so inclined, please be my guest.

Saturday, January 3, 2009

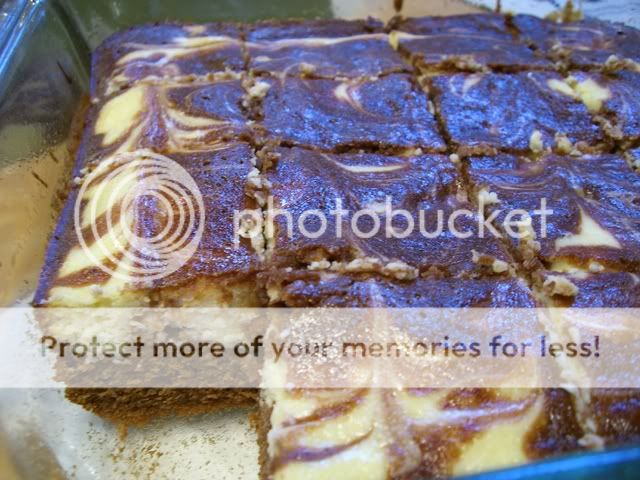
Peppermint Cheesecake Brownies


Confession: I don't even like peppermint, but when I saw these brownies in Cooking Light, I knew I had to make them. Unfortunately, I was about halfway through the holidays when I realized that I didn't want any more sweets around. So I decided to save them to make for an open house we were going to on New Year's Day. Sure enough, they were a big hit. Reviews of the recipe said that the peppermint flavor wasn't terribly pronounced, so I doubled the amount of extract. Even I liked these!

Peppermint Cheesecake Brownies
adapted from Cooking Light, December 2008

Ingredients

Cheesecake Batter:
1 8 oz block of 1/3 reduced fat cream cheese
1/3 cup granulated sugar
1/2 tsp peppermint extract
1 large egg
1 large egg white
1 tbsp all-purpose flour

Brownie Batter:
4.5 oz all-purpose flour (about 1 cup)
1/2 cup unsweetened cocoa
1/2 tsp salt
1 1/2 cups packed brown sugar
1/4 cup canola oil
1/4 cup buttermilk
2 tsp vanilla extract
1 large egg
2 large egg whites
Cooking Spray

Preparation

1. Preheat oven to 350°.

2. To prepare cheesecake batter, place cheese in a medium bowl; beat with a mixer at medium speed until smooth. Add granulated sugar and peppermint extract; beat well. Add 1 egg and 1 egg white; beat well. Add 1 tablespoon flour; beat mixture just until blended.

3. To prepare brownie batter, weigh or lightly spoon 4.5 ounces (about 1 cup) flour into a dry measuring cup; level with a knife. Combine 4.5 ounces flour, cocoa, and salt in a medium bowl, stirring with a whisk. Combine brown sugar, oil, buttermilk, vanilla, 2 egg whites, and 1 egg in a large bowl; beat with a mixer at medium-high speed until well blended. Add flour mixture to brown sugar mixture; beat at low speed just until blended.

4. Reserve 1/2 cup of brownie batter. Pour remaining batter into a 9-inch square baking pan coated with cooking spray. Carefully pour cheesecake batter over top; spread evenly to edges. Dot cheesecake batter with reserved brownie batter. Swirl top two layers of batters together using the tip of a knife. Bake at 350° for 26 minutes or until top is set. Cool completely in pan on a wire rack.

Nutritional Information

Calories: 213 (32% from fat)
Fat: 7.5g (sat 2.6g,mono 2.3g,poly 1.1g)
Protein: 4.4g
Carbohydrate: 32.3g
Fiber: 0.7g
Cholesterol: 37mg
Iron: 1.3mg
Sodium: 169mg
Calcium: 32mg

Another Viognier Meal

Remember the Becker Vineyards Viognier I waxed poetic about for an entire entry? Well, when we were in Austin for my half-brother's wedding at the beginning of December, Joe and I realized that, because my dad was driving back, we could buy a whole case of Viognier. So we did, on one condition specified by me: we have to treat drinking it like a special occasion.

After Christmas dinner, I made chicken stock from the carcass of our roast chicken, and since I had never made risotto using homemade chicken stock, I knew that's what some of it would be used for. Alongside spicy Italian chicken sausage from Trader Joe's and sauteed spinach, the wine completed a wonderful meal. Joe is responsible for the artistic presentation.

Friday, January 2, 2009

English Muffin Bread


Anyone who has looked in my parents' pantry knows that my dad is a collector of jams, jellies, and preserves. I don't think we've ever had to actively think about buying jams or preserves because there are always so many in the house. Growing up, my favorite way to enjoy the latest acquisition of apricot preserves or orange marmalade was on an English muffin.

When I saw this bread on Amber's Delectable Delights, I knew it would be a hit, especially for this past week when both Joe and I were off and slept in and made big breakfasts. I halved the recipe to only make one loaf, but I wish I had made both loaves, as I easily could've given the other loaf to my dad if we didn't eat it first.

Joe and I enjoyed slices of this bread equally as a base for a breakfast sandwich of ham, cheese, and egg and for spreading it with delicious apricot jam.


English Muffin Bread
source: Amber's Delectable Delights

Yield: 2 loaves

Ingredients

Cornmeal
6 cups all purpose flour
2 packages active dry yeast
1/4 teaspoon baking soda
2 cups milk
1/2 cup water
1 tablespoon sugar
1 teaspoon salt

Preparation

1. Grease two 8x4x2-inch loaf pans. Lightly sprinkle pans with enough cornmeal to coat bottom and sides; set pans aside.
2. In a large mixing bowl combine 3 cups of the flour, the yeast, and baking soda; set aside. In a medium saucepan heat and stir milk, water, sugar and, salt just until warm (120 to 130 degrees F). Using a wooden spoon, stir milk mixture into flour mixture. Stir in remaining flour.
3. Divide dough in half. Place dough in prepared pans. Sprinkle tops with cornmeal. Cover and let rise in a warm place until doubled in size (about 45 minutes).
4. Bake in a 400 degree oven about 25 minutes or until golden brown. Immediately remove bread from pans. Cool on wire racks.

South of the Border Skillet

This was originally called South of the Border Casserole, though you don't really bake it so I changed the name. Joe really like this a lot. In fact, he liked it so much that he asked to have the leftovers for dinner the next night. I think the fresh jalapeno adds a dimension to the dish that makes it different from similar dishes. I will definitely make this again. It's a one-pot dish, so it's great for weeknights.

South of the Border Skillet
source: Taste of Home Cooking

Ingredients
1 pound of lean ground beef
1 jalapeno, ribs and seeds removed from half, minced
1 large bell pepper, chopped
1 large onion, chopped
3 cloves of garlic, minced
28 ounce can of whole tomatoes (fire roasted tomatoes, if you can find them) (I used diced tomatoes.)
2 tablespoons chili powder
2 tablespoons of cumin
2 tablespoons olive oil
2 cups sour cream (I used reduced fat.)
8 oz penne, ziti or any small pasta
1 cup shredded cheddar cheese
1/4 cup cilantro, minced

In a large deep skillet, brown meat until no longer pink. Drain fat, if necessary. Add the olive oil, peppers, onions and garlic, season with salt and pepper, and cook on medium-high heat. Saute until softened, about 8-10 minutes. Add chili powder and cumin. Add the can of tomatoes, breaking up the whole tomatoes with a spoon, but still leaving big chunks. Add sour cream, stir until mixed. Add pasta. Cover and cook until pasta is al dente, about 25 minutes. Make sure to stir frequently so the pasta doesn't get stuck to the bottom. Serve with the cheddar cheese and cilantro sprinkled on top.

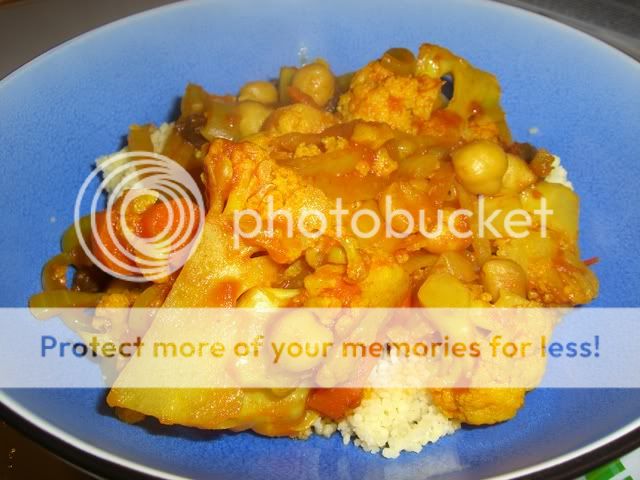
Cauliflower-Chickpea Tagine

First off, Happy New Year! 2008 was a crazy year for me, so I'm hoping 2009 will be a little calmer. If you're like most people, including me, you probably are wanting a break from the overindulgent foods associated with the holidays. This is a wonderful, flavorful dish that will keep you warm through January while still being healthy and full of vegetables. You don't have to eat salads to eat healthy!

I especially liked the way the raisins plumped up during the cooking. They added a hint of sweetness that contrasted with the spice of the cayenne pepper.

Cauliflower-Chickpea Tagine
source: Big City Cooking

Ingredients

1 tbsp olive oil
1 large onion, thinly sliced
3 garlic cloves, slices
1 head of cauliflower, broken into florets
3 carrots, sliced thinly
1 15-oz can of chickpeas, drained (I used 2 cups of cooked dried chickpeas)
1 15-oz can of crushed tomatoes
1 cup vegetable broth
1/4 cup raisins
1/4 tsp cinnamon
1 tsp turmeric
1 1/2 tsps cumin
1/2 tsp cayenne

In a large pot, heat oil over medium heat, and sauté onions until translucent. Add garlic and sauté another minute. Add remaining ingredients. Bring to a boil, then lower to simmer. Cook covered for about an hour, or until all vegetables are soft. Serve over whole wheat couscous.