Thursday, December 31, 2009

2009 Year In Review


I don't think I got around to doing one of these posts last year, but I have a little time, so I figured it would be a good time to recap the year. Instead of doing a Top 10 posts or something like that, I just want to talk a little about my year and then tell you what recipes from 2009 I've been making over and over again. In any event, Happy New Year from Joe and me! I hope you all have a wonderful 2010 and eat lots of delicious food!

From January through April, I was in school, hard at work but still managed to cook quite a bit. For Lent, I became pescatarian and really enjoyed finding creative ways to eat mostly vegetarian while still keeping my husband happy. By Easter, I think Joe was impressed, though he said he did not want me to do it again this year. In March, we visited Savannah and Atlanta on our Spring Break and had a wonderful time, even though the weather was unseasonably cool.

In May, I started my Clinical Pastoral Education, working as a chaplain for hospice. It was so much more exhausting than normal school work that I rarely cooked anything new. The fortunate thing about the summer was that Joe was finally finished with his intern year of residency, so we were able to travel a bit on the weekends. We especially enjoyed our trip to the Louisville-area to visit friends in July. That was also what sparked the idea for our Bourbon Trail Adventure!

In August, somewhat to our surprise and amazement, we bought a condo and moved. Although I had a much bigger kitchen, school hit me really hard this semester. Our new place is also conveniently close to many restaurants that we wanted to try, which led to a decrease in my experimenting and trying new dishes. For my 25th birthday, we had a marvelous local, sustainable dinner at Delvin Farms. In November, my niece was born, and Joe and I had our Kentucky Bourbon Trail experience (Part 1 and Part 2). After my finals and papers were turned in, my dad and I drove to Austin to visit his granddaughter and my niece. We also ate a lot of Tex-Mex. Then my parents and Joe and I drove to Charlottesville, VA for Christmas to be with my grandparents and other family.

It's been an exciting year. I'm halfway finished with graduate school. We bought our first property. Our cats and parents are healthy. We are so fortunate to be living in a great location in a great city with wonderful friends and vocational opportunities for both of us.

Having a food blog is interesting because it's difficult to tell what I actually make repeatedly, what goes permanently in the kitchen repertoire due to taste, ease of preparation, or, more likely, a combination of the two. So now is the time when I'll tell you what I made in 2009 that I make repeatedly. They aren't necessarily the BEST meals I made, but they are my kitchen staples.

Black Bean Burrito Bake
Soba Salad with Feta and Peas
Tomato Basil Soup
Black Bean Tortilla Casserole
Quinoa Soup with Avocado and Corn
Oatmeal Breakfast Clafoutis
Thai Peanut Turkey Burgers
Roasted Corn and Goat Cheese Quesadillas
Mango-Agave Sorbet
Gnocchi with Summer Vegetables
Ham and Cheese Corn Muffins

Wednesday, December 30, 2009

Kale and White Bean Soup

Look at that bowl full of delicious vegetables and hearty greens. You can almost feel the health benefits from that dark green leafy kale. Due to the Southern tradition of eating greens and black-eyed peas on New Year's Day, both items were drastically on sale this week, so I stocked up on two large bags of kale, already washed and chopped for me. That made this soup even easier. Without the sprinkle of cheese on top, it would also be vegan, if you so desire. Despite lacking any strong spice in the recipe, the flavor of all the ingredients balanced nicely. The sweetness of the carrots and acidity of the tomatoes complemented the strong flavor of the greens with the beans adding protein and heft. It also comes together very quickly, making it a perfect weeknight soup.

Kale and White Bean Soup
source: Whole Foods Market

Ingredients
1 tbsp olive oil
1 cup diced yellow onion
4 large garlic cloves, roughly chopped
1 (32-ounce) box vegetable broth
4 cups packed chopped kale (I tossed in 4 big handfuls.)
1 (14.5-ounce) can Italian-Style Diced Tomatoes
1 (14.5-ounce) can cannellini beans, drained and rinsed
2 large carrots, peeled and sliced

Preparation
In a large saucepan, heat olive oil over medium heat. Add onion and cook 3 minutes. Add garlic and cook 2 minutes longer. Add broth, kale, tomatoes, and fresh carrots and cover. Cook 5 minutes or until kale is tender. Add beans and heat thoroughly. Serve hot, garnished with Parmesan cheese or croutons, if you like.

Tuesday, December 29, 2009

Ancho Pork and Hominy Stew

Like many others, I overindulged this holiday season. Add to that an unusually stressful semester at school, which led to some stress-eating during finals, and stepping on the scale yesterday was not a pretty sight. But in the middle of winter, who wants a salad? This is the time of year when I crave thick, hearty stews and regular "diet" food is not going to do it for me.

Yet again, Cooking Light to the rescue. This stew is only 300 calories per serving but is immensely filling and flavorful. I consider a meal a success when Joe asks if he can take the leftovers for lunch. After two bites of this stew, he asked if he could take the leftovers for the next few days! Joe's Christmas present to me was a beautiful red, oval-shaped, 6 qt enameled cast iron Dutch oven, and it was the perfect vessel for this stew. During the searing of the pork, those lovely little brown bits stuck to the bottom of the pot and were scraped into the broth, adding a ton of flavor. I served this with the jalapeno corn bread recommended by Cooking Light, made in my cast iron skillet. Follow the link for additional nutritional information and the cornbread recipe.

Ancho Pork and Hominy Stew
source: Cooking Light December 2009
Yields 6 servings

Ingredients
2 tbsp ancho chile powder (or other high-quality chili powder. I used Penzey's Chile 3000.)
2 tsp dried oregano
1 1/2 tsp smoked paprika
1 tsp ground cumin (I halved the cumin because I used regular chili powder.)
1/2 tsp salt
1 1/2 lbs pork tenderloin, trimmed and cut into 1/2-inch pieces
1 tbsp olive oil, divided
2 cups chopped onion
1 1/2 cups chopped green bell pepper
1 tbsp minced garlic
2 1/2 cups fat-free less-sodium chicken broth
1 28 oz can hominy, drained
1 14.5 oz can fire-roasted diced tomatoes, undrained

Preparation

1. Combine dry spices in a large bowl and set aside 1 1/2 tsp of spice mixture. It will be added in later. Toss the pork pieces with the spices until thoroughly coated.

2. Heat 2 tsp oil in a Dutch oven over medium-high heat, and add pork mixture to pan. Cook about 5 minutes, stirring occasionally, or until browned. Remove pork from the pan and set aside.

3. Add remaining 1 tsp oil. Add onion, bell pepper, and garlic. Cook 5 minutes, stirring, or until tender. Add pork back into the pan, along with the reserved spice mixture. Add broth, hominy, and tomatoes. Bring contents to a boil, then reduce to a simmer. Partially cover and simmer for at least 25 minutes.

Monday, December 28, 2009

Cranberry Pork Roast

I feel like I'm really on a pork kick lately. It goes so well with all kinds of fruits, and there are so many different cuts and uses for pork. This roast could even take the place of a beef roast at a holiday meal, especially since the cranberries make it so festive. Of course, I'm a little late for that since I've been out of town. First, my dad and I drove to Austin to visit my brother and my new niece who was born on November 11th. Then we went to Charlottesville, VA for Christmas with my grandparents. LOTS of time in the car and not so much time cooking healthful food. Joe gave me a lovely flame red enameled cast iron Dutch oven for Christmas, and I'm looking forward to using that very shortly!

Cranberry Pork Roast
adapted from: Beantown Baker

Ingredients
1 (2.5-3 lb) pork loin roast or rib roast
1 teaspoon ground ginger
1/2 teaspoon dried mustard
1/2 teaspoon salt
1/4 teaspoon pepper
2 tablespoons cornstarch
1 cup fresh cranberries
1/2 cup white sugar
1/2 cup brown
1/3 cup dried cranberries
3 cloves garlic, chopped
1/3 cup cranberry juice
1/2 small lemon, thinly sliced

Preparation

Mix dry spices and cornstarch together. Pat meat dry and rub spice mixture onto all surfaces of the meat. Add to a 4-6 qt slow-cooker.

Add fresh cranberries, sugar, dried cranberries, and garlic. Pour in cranberry juice, and top with lemon slices.

Cover and cook on low for 8 hours, or high for about 4. The longer you cook the meat, the more tender it will be.

Thursday, December 17, 2009

Cranberry Ginger Muffins

Nothing says winter to me quite like cranberries. Those tart red orbs are a classic flavor this time of year. In graduate school, we read and absorb so much that we joke about how sometimes we don't have an original thought. Even when I think I may have had an original thought, I can usually go back in a book I've read or a lecture I've listened to and find the same idea. The same thing goes for cooking. I'm just honestly not that brilliant of a cook, so when I thought "cranberries and candied ginger in a muffin," I knew someone else had probably had the same thought at some point. So I went searching and found this recipe.

These muffins have some strong flavors going on. With the tartness of the cranberries and spice of the ginger, no one will mistake these for cake. The oats bulk them up. They freeze well and, heated up in the microwave, make the perfect pre-exam breakfast. Or really any kind of breakfast.

Cranberry Ginger Muffins
source: Coconut & Lime

Ingredients

1 1/4 cup flour
1 cup buttermilk
1 cup old fashioned rolled oats
1 cup cranberries
1/3 cup canola oil
1/3 cup chopped uncrystallized candied ginger (I used crystallized candied ginger)
1/3 cup light brown sugar
2 teaspoon baking soda
1/2 teaspoon salt
1 egg

Preparation

Preheat oven to 350. Line or grease and flour one 12 well muffin tin. In a large bowl, mix together the oatmeal, egg, oil, milk, and sugar. After it is thoroughly mixed, add in the flour, salt and baking soda. Stir to combine. Fold in the cranberries and ginger chunks. Divide evenly amount 12 muffin wells.


Bake 15-20 minutes or until a toothpick inserted in the center of the center muffin comes out clean. (Mine took about 25 minutes.)

Wednesday, December 16, 2009

Bourbon Ball Martini

What good would my trip to the Bourbon Trail be if I did not present you with fun ways to enjoy bourbon? Many of the distilleries sold bourbon balls in their gift shops, a chocolate covered candy sometimes topped with a pecan. At the Heaven Hill distillery, I purchased a small book called Cooking with Bourbon containing recipes from appetizers to entrees to desserts and, the most important section, cocktails, which is where this recipe came from. As a warning, this makes a rather large martini, so you might want to split it with someone you love. One of the things I like about this drink is that it isn't creamy like so many dessert-y cocktails. The recipe recommends that you garnish with bourbon balls, but chocolate shavings would also be a nice touch.

Bourbon Ball Martinis
source: Cooking with Bourbon

Ingredients
2 oz. bourbon whiskey
2 oz. creme de cocao
1 1/2 oz. hazelnut liqueur (like Frangelico)

Fill a shaker with cracked ice. Combine ingredients, shaking to chill. Strain into a martini glass. Garnish with two bourbon ball chocolates on a skewer.

Tuesday, December 15, 2009

Crockpot Red Curry Chicken with Butternut Squash

Somebody recently stated that they don't "get" crockpots. What's not to get? With often minimal preparation, the crockpot makes dinner for you, yielding blended flavors and moist, tender meat. This crockpot meal is relatively prep-heavy, even if you skip browning the chicken like I did, so it's better for a weekend meal, or you could prep it the night before and keep it in the refrigerator. Either way, coming home to a delicious, healthy curry makes any day better.

Next time, I would follow Cara's steps instead of trying to make it faster. I definitely missed some flavor, though the texture was deliciously creamy due to the squash. As an alternative to the fat-laden curries that I like from Thai restaurants, this does the trick. I served it on top of jasmine rice that I cooked using the rest of the coconut milk.

Crockpot Red Curry Chicken with Butternut Squash
source: Cara's Cravings

Ingredients
1 medium onion, diced
1 red bell pepper, diced
1lb butternut squash, peeled and chopped (or substitute another winter squash)
2 boneless skinless chicken breasts, about 6oz each
1/2-1 tsp each cinnamon, ginger, and cumin
salt & pepper
2 tsp red curry paste
2 cloves of garlic
1 tbsp fish sauce
juice from 1/2 lime
1 cup coconut milk
1 cup chicken broth
1 tbsp cornstarch
fresh basil or cilantro, for garnish

Preparation

Place the onions, peppers, and squash in the bottom of the crockpot.

Cut the chicken into small pieces and toss with the cinnamon, ginger, cumin, salt and pepper. Heat a nonstick skillet over medium heat, and saute the chicken for a few minutes on each side, until browned.

Place the chicken in the crockpot. Combine the curry paste, garlic, fish sauce, lime juice, coconut milk, extract, and broth in a blender and process until smooth. Pour over the chicken and vegetables.

Cover and cook on low for 6 hours. Stir cornstarch into 2 tbsp of water until no lumps remain and gently stir into the liquid in the crockpot. Increase heat to high and cook for another 20 minutes to thicken. Garnish with basil or cilantro.

Monday, December 14, 2009

Kentucky Bourbon Trail, Part 2

Okay, I'm back to tell you about the second half of our trip to the Bourbon Trail. Here's Part One.

We headed off on Tuesday morning to Buffalo Trace Distillery to make their 10 am tour. Our tour guide was absolutely fantastic, very energetic and knowledgeable. The tour started off with a cheesy video and then we learned a little bit about bourbon.

Although we didn't see much of the grounds on the tour, Buffalo Trace has beautiful, sprawling grounds that were just getting decorated for the holidays with lights and such. One of things that tickles me about the distilleries is that they're such an ingrained part of life in the area. Buffalo Trace has an Easter egg hunt, and we passed what looked like a elementary school that was sponsored by Wild Turkey.

Buffalo Trace is the oldest continuously operating distillery. Due to Prohibition, most distilleries closed down, but Buffalo Trace was allowed to continue operating in order to produce medicinal whiskey. On this tour, we did not see any of the distilling process, though they do have a "hard hat" tour by reservation.

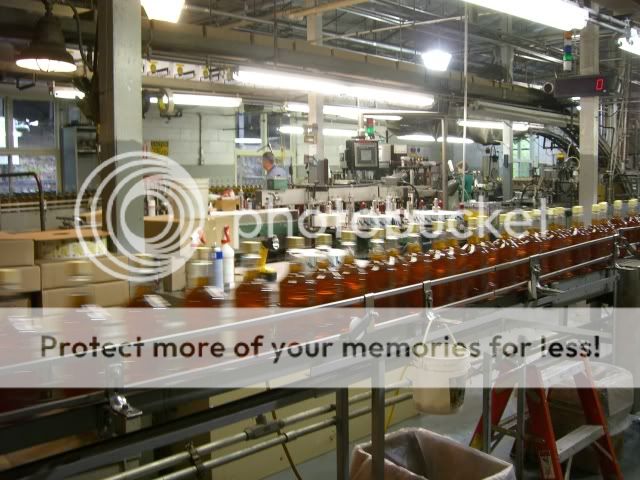
They were bottling Blanton's when we were there. Blanton's is not only a very fine whiskey, but the stoppers also have different jockeys on top that spell out B-L-A-N-T-O-N-S if you collect them all. I enjoyed this tour because our tour guide gave us a lot of fun trivia about bourbon and Buffalo Trace in general. A short tasting followed the tour, and Buffalo Trace's gift shop was one of the nicer ones in terms of the sheer variety of things they offered.

Next we followed the turkey tracks to Wild Turkey Distillery.

We arrived shortly before their 12:30 pm tour and took the time to have some hot cider and peruse the gift shop. Our tour guide was, to be blunt, not very entertaining, and I had some difficulty hearing him. We saw quite a bit of the distilling process and machinery, but after the sixth fermentation tank, it isn't as exciting. Until...

we met Jimmy Russell, master distiller of Wild Turkey for 55 years. He's kind of a big deal in the bourbon world but didn't seem to mind taking a bit of time to talk to us. It completely redeemed the tour, especially considering that there is no tasting.

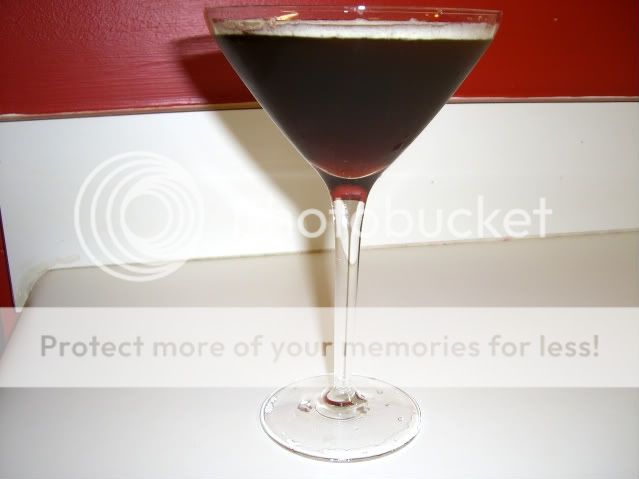
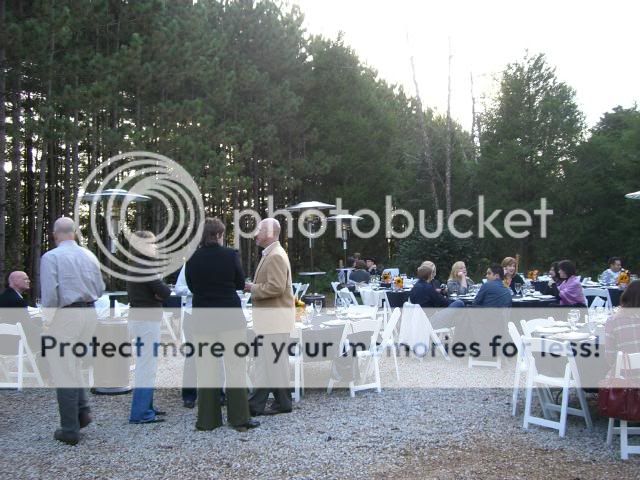
Next up was my absolute favorite tour. Joe and I had debated about going to Woodford Reserve, but we were so glad that we did. On the drive there, we passed several horse farms with large houses set on a gently rolling carpet of green. When we pulled into the distillery, we could hardly believe our eyes: gorgeous white limestone buildings nestled in a valley. This was the only tour that cost anything ($5) but we gladly paid it and warmed up with some bourbon coffee while we waited for our tour to start.

Another video kicked off the tour which was led by a retired science teacher, so he knew how to keep us entertained. He explained the bourbon-making process in a way that I understood things I had heard 6 times before and never quite caught. Woodford Reserve is simply stunningly beautiful, and they triple-distill their whiskey through these gorgeous copper stills.

Interestingly enough, they also heat and cool their warehouses whereas other distilleries rely on nature. They also claim that they are the only distillery that also raises horses, though the horses were off racing. We saw a bit of the bottling process and then headed back up the hill to try some Woodford Reserve (official bourbon of the Kentucky Derby!) which came in a small plastic glass that we could keep. If you could only go on one distillery tour, I would definitely recommend Woodford Reserve or Maker's Mark, depending on which end of the trail you're close to.

The sun was setting so we headed back to Lexington for a few drinks before dinner. We planned on eating at The Dish and parked our car close to the restaurant hoping to find a place close by. After wandering into a bar that didn't seem to welcoming to non-regulars, we walked around the corner to Buddy's Bar and Grill where they had a big sign posted with their Happy Hour specials. With 1/2 off appetizers and $2 premium drafts, we decided to pull up some seats at the bar and join the guys watching the UK basketball game. The bartender was friendly and helpful and let us try the Kentucky Bourbon Barrel Ale before we bought a pint. The Bourbon Barrel Ale is an ale that is aged for up to 6 weeks in used bourbon barrels giving it that sweet oaky taste of bourbon and kicking the ABV up to almost 8%. I wouldn't drink this beer all the time, but it's a neat novelty.

Our dinner at The Dish was quite lovely and was our one "nice" dinner out. I had the Grouper and Butternut Squash Ravioli, but Joe won the ordering contest with his Hazelnut Stuffed Chicken. His came with these caramelized brussel sprouts that were delicious. We drove back to Bardstown stuffed and happy.

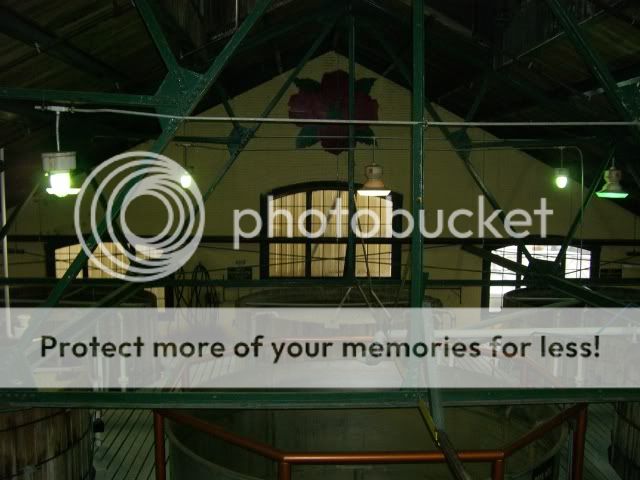
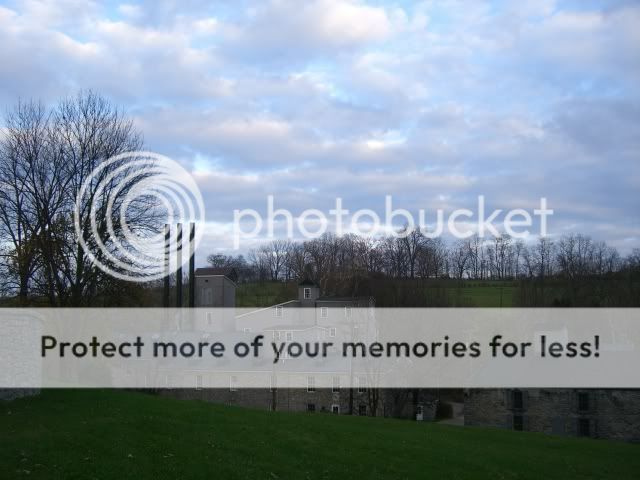
We still had one more distillery to go: Heaven Hill Distillery. This one was easy, located right outside historic Bardstown. I am unsure what their tour hours are, but we arrived and were told one would be starting in a few minutes. The Bourbon Heritage Center has all kinds of neat exhibits ranging from trivia to historic stills that were used by pioneers. So if you have to wait for a tour, you can entertain yourself. Heaven Hill suffered a very bad fire in 1996. Like you probably can imagine, whiskey can BURN.

These are Heaven Hill's rickhouses. Their distilling process currently happens in Louisville, but they store the barrels and bottle in Bardstown. We mainly toured the rickhouses and watched a video. The best part of the tour was the tasting. Inside of the Bourbon Heritage Center is a GORGEOUS tasting room shaped like a bourbon barrel. We tried Evan Williams Special Reserve and Elijah Craig 12 yr. I found the Elijah Craig just slightly too oaky for my tastes. I wish we had poked around the exhibits a little bit more as they were very informative and presented well.

On our way out of town, we stopped at Toddy's Liquors in Bardstown, which was recommended by our Tom Moore guide. They had an amazing selection of bourbons, and their prices were at least a few dollars cheaper than at the distilleries. When we bought a bottle of Woodford Reserve, the cashier remarked that they had received some gift sets that day that were the same price as just the bottle and swapped it out.

Our last stop was Jim Beam since we didn't get to see the video or do a tasting the first day. It was on our way back to the interstate so it wasn't too much of a detour. We tasted Red Stag, their cherry-infused bourbon (which I like chilled though it tasted like cough syrup neat) and Basil Hayden's. Jim Beam is MASSIVE, and they don't have a tour set up, so they take you to Booker Noe's old house and show a short video explaining the history of the distillery.

This is me with Booker Noe in front of his house. They are planning on restoring some of the older buildings and developing more of a tour.

My completed Kentucky Bourbon Trail passport! I sent it in and will receive a t-shirt. A few distilleries had the t-shirt on display, and they are surprisingly nice-looking.

I would highly recommend the Kentucky Bourbon Trail for an affordable domestic vacation. There is so much to think about that the distilling process captures: modernization and the need for a consistent product, American history, the effects of Prohibition, etc. In a time where people are concerned about preservatives and eating locally, bourbon is made mostly from corn grown within 100 miles of the distillery, by law cannot have any additives, and uses water from local lakes that is naturally filtered by limestone. The distilling industry also employs American citizens in an area of the country that would be much more impoverished if not for the industry.

Joe and I planned our trip primarily using Bourbon Review magazine, which gave us information about distilleries as well as ideas on where to eat and drink in Lexington. As I've said, if you could do one distillery tour, either Maker's Mark or Woodford Reserve would be a great choice. Unless you're a big Jim Beam or Wild Turkey fan, I could have done without going on those tours if we had been stressed for time. If you have any further questions, please contact me!

Thursday, December 3, 2009

Cinnamon Ice Cream

I tried to keep things relatively simple for Thanksgiving this year, knowing that Joe and I were going to be out of town up until the day before, so I wouldn't have a lot of time beforehand to prep. Consequently, I was a lot more relaxed than I have been in previous years. So relaxed that I ended up burning the rolls. Oh well! Before we left on our trip, I made this ice cream to go with the standard pumpkin and Chocolate Bourbon Pecan Pies. It was the perfect complement. The cinnamon flavor is definitely present but not overbearing, and it made the ice cream slightly more exciting and seasonal than plain vanilla. This is the perfect ice cream with which to top your apple, pecan, pumpkin, or any other variation of fall pie.

Cinnamon Ice Cream
source: Lime in the Coconut (originally from David Leibowitz's The Perfect Scoop)

Ingredients
1 cup whole milk
3/4 cup sugar
pinch of salt
10 3-in long cinnamon sticks, broken up (I bought mine for a very affordable price at Cost Plus World Market)
2 cups heavy cream
5 large egg yolks

Preparation
Warm the milk, sugar, salt, cinnamon sticks and 1 cup of the cream in a medium saucepan. Once warm, cover, remove from the heat, and let steep at room temperature for at least one hour.

Rewarm the cinnamon-infused milk mixture. Remove the cinnamon sticks with a slotted spoon and discard. Pour the remaining cup of cream into a bowl and set a strainer on top.

In a separate bowl, whisk together egg yolks. Slowly pour the warm mixture into the egg yolks, whisking constantly, then scrap the egg yolk mixture back into the saucepan. Stir the mixture constantly over medium heat, scraping the bottom, until the mixture coats the back of a spoon. Pour the custard into the strainer set over the cream. Refrigerate until cool.

Freeze in ice cream maker according to manufacturer's directions.

Saturday, November 28, 2009

Kentucky Bourbon Trail, Part 1

This year has been quite the eventful year for Joe and me, so when our week-long vacation was coming up Thanksgiving week, we wanted to go on vacation but couldn't break the bank doing it. After our trip to the Louisville area and the Maker's Mark distillery, we decided to take a trip to the Bourbon Trail, see more of the distilleries, and eat, drink, and relax. Only 2 and a half hours from Nashville and all but one of the tours are free, making it a very affordable get-away.

We left Nashville after church on Sunday and arrived at our bed and breakfast in Bardstown, Kentucky by 4 pm. After consulting and comparing several websites, the You're Invited Inn B&B was the most affordable and ranked #1 on Tripadvisor.com. We stayed in the red and gold room, which was exquisitely decorated and comfortable. Alvin and Easter, the owners, were so kind and welcoming that we felt like we were staying at some friend's parents' house. Every morning included a 3-course breakfast, which kept us full nearly until dinner. I cannot say enough good things about You're Invited Inn and would recommend it to anyone looking to stay in the area. It's just a few miles from historic Bardstown but very close to the Bluegrass Parkway, which provided easy access to the Lawrenceburg-area distilleries.

Once we got settled in and took a short nap, we decided to venture out to downtown Bardstown. Note: it is very difficult to find restaurants in small towns in the South that are open on Sunday. We weren't hungry yet, so we stopped at the Old Talbott Tavern Bourbon Bar to get our first taste of the Bourbon Trail.


They had a sampler of bourbons where you could pick 5 for $25, which we split. This was quite a good deal since some 1 oz pours of the same bourbons can run $8 or $9. From left to right, we had Bakers, Blantons, Four Roses Single Barrel, Elijah Craig 18 yr, and Wild Turkey Rare Breed. I particularly liked the Wild Turkey Rare Breed for its smokiness. Even after 4 other bourbons, it stood out in flavor. With our bourbon itch scratched, we roamed the dark streets of downtown looking for food to no avail. Our GPS did not provide many options either, but we ended up at an American casual restaurant called BJ's for some sandwiches and beer and then headed back to the B&B to rest up for our day of visiting distilleries.


Our plan for the day involved starting at the Jim Beam distillery (about 20 miles NW of Bardstown). However, when we arrived, we found out there was no tour, and the person who normally shows the video was out. The lady working informed us that the Tom Moore Distillery, our next stop, only had two tours a day, 9:30 am and 1:30 pm, by reservation, but if we hurried, we could make it. I called up the distillery, reserved our spots, and we zoomed back to Bardstown. The Tom Moore Distillery's most well-known bourbon is the 1792 Ridgemont Reserve, though they make 6 brands. They also have a very large bottling facility where they bottle 52 brands. They only recently reopened to the public in 2008 and have no visitor's center or tasting room, so we drove around the campus in a shuttle bus. The tour lasts approximately two hours (the longest tour of all the distilleries). There was only one other couple with us, so it was a small tour.


The bottling facility was incredible. Three lines were working that day bottling brandy, a lower-shelf bourbon, and tequila. The average length of career at Tom Moore is 26 years, so there is very little turnover. Everyone was friendly and let us gawk all we liked.


In addition to the distillation equipment, we also observed the barrels waiting to be filled and then shipped off to the rickhouses. Barrels that are used to age bourbon must, by law, be virgin, charred, white oak barrels. The charring caramelizes the natural sugar and gives the bourbon its flavor and color as the liquid moves in and out of the wood over several years. Bourbon must be aged at least two years in the barrels. When the barrels are emptied, they can be used to store brandy or other spirits and are often sold to Scotland to store Scotch. Empty, the barrels way about 130 pounds, but when full, they can weigh between 500-550 pounds.

Above is a barrel that has been aging for 10 years. The markings on the barrel show that it was barreled on November 22, 1999. When you walk into the rickhouses (the storage facilities for the barrels), you can smell the bourbon in the air. Over time, liquid in the barrel evaporates. The loss is approximately 5% the first year with 2-4% every following year.

Joe and I very much enjoyed the Tom Moore tour and thought it was the most thorough tour of the whole bourbon-making process, from when the corn and other grains arrive at the distillery to the bottling, labeling, and shipping process. It was lengthy and tiring, however. It also gives one a sense of the large distillery industry. The distillery itself was not very pretty, and we had to wear safety goggles, though it was fascinating to get such an inside glimpse of how bourbon is made today.


Our next stop was the Four Roses distillery near Lawrenceburg. The unique thing about Four Roses is the Spanish mission-style architecture, which is listed on the National Register of Historic Places. Having seen so much on Tom Moore, I was not as impressed with the Four Roses tour, though they make some fine bourbon.


Above is a picture of the room that holds the fermentation tanks. After the corn (at least 51%) and other grains are mashed up and cooked, they are put into these tanks with special strains of yeast. Four Roses uses 10 recipes, which is also unique: 2 grain ratios and 5 strains of yeast. The blending of these recipes is what produces their bourbon. The other unique thing about the Four Roses process is that they store their barrels in single story warehouses. The other distilleries' warehouses are up to six stories tall. When you walk into one of these fermentation rooms, the smell of yeast is almost overpowering, and anyone who has worked with yeast in the kitchen will recognize it immediately. The tanks bubble away as the yeast goes to work turning sugars into ethanol for three to five days. At the end of the tour, we tasted the Four Roses Yellow Label, Four Roses Small Batch, and Four Roses Single Barrel. My favorite was the Small Batch.
The Four Roses gift shop is very nice, and the gift shop attendant was quite helpful as we wanted to go to Lover's Leap Winery as our next stop but didn't have an address. After Tom Moore and Four Roses, I was bourboned out and needed to rest my feet.

Lover's Leap Winery is located in Lawrenceburg and provided the perfect respite after several distillery tours. When we visited, it was chilly and misting, but the winery has a beautiful outside porch. We tried 6 wines for $5 (which included the wine glass) and bought a glass for $5 each along with some locally made cheese and crackers. We were the only patrons and enjoyed having the place to ourselves.

I was pleasantly surprised by how much I enjoyed the wines, particularly the reds. I tried the Vidal Blanc (light, dry, crisp), the Bianca (more citrus and floral notes), the Sloppy Seconds (a surprisingly good blend of 7 different varietals), the Merlot, 2006 Cabernet Sauvignon, and Cynthiana. I had a full glass of the Cabernet Sauvignon, and as you can see, it was a generous pour!

Having been unimpressed by the dinner offerings in Bardstown, Joe suggested we drive the short distance to Lexington for some drinks and dinner. Our first stop was Soundbar where I had a Manhattan, and Joe had some Knob's Creek. On our way to find a place for dinner, we spotted the Bluegrass Tavern, which we had written down as a place to try in Lexington. Their bourbon selection was incredible, and Bobby, our bartender, was extraordinarily helpful, recommending bourbons we might like and just chatting with us for a while. We had half-ounce pours of Bulleit, Elijah Craig 12 yr, Pappy Van Winkle 15 yr (which was AMAZING), and Elijah Craig 18 yr single barrel. Then Bobby pointed us in the direction of Mia's, a locally-owned gay restaurant. The crabcake sandwich was perfect for soaking up some of the bourbon. Unfortunately, they had run out of potatoes for their hand-cut fries, but we enjoyed our (quite affordable) dinner and the hip atmosphere. Joe drove us safely back to Bardstown where we rested up for another day on the trail! To be continued...

Friday, November 20, 2009

Stuffed Poblanos

Poblanos are probably my favorite pepper: more exotic than a bell pepper but can be used in similar ways. At Mexican restaurants, if I see some sort of item with poblanos involved, I will most likely order it. These stuffed poblanos scratched the Mexican food itch without the grease normally involved. It starts with a salsa made in the blender, which the poblanos cook in. I liked the cornmeal filling for the poblanos as it adds some heft. I realized, after I took these out of the oven, this meal does not require the stovetop at all! I served this with the salad from the Black Bean and Rice Stuffed Poblanos I made last spring.

Stuffed Poblanos
source: Ezra Pound Cake as adapted from Everyday Food

Ingredients
  • 1 can (28 ounces) whole tomatoes in puree
  • 1 jalapeno, ribs and seeds removed, minced
  • 2 small onions, chopped
  • 3 garlic cloves (2 whole, 1 minced)
  • Coarse salt and ground pepper
  • 1 can (19 ounces) black beans, rinsed and drained (I used a 15 oz can)
  • 1/2 cup yellow cornmeal
  • 1 cup shredded pepper Jack cheese (I used sharp cheddar)
  • 1 teaspoon ground cumin
  • 4 large poblano chiles, halved lengthwise (stems left intact), ribs and seeds removed
  • Garnishes: sour cream, cilantro, lime zest
Preparation

1. Preheat oven to 425 degrees F.

2. In a blender, combine tomatoes in puree, jalapeno, half the onions, and 2 whole garlic cloves; puree. Season with salt. Pour sauce into a 9-by-13-inch baking dish; set aside.

3. In a medium bowl, combine beans, cornmeal, 1/2 cup cheese, remaining onions, minced garlic, cumin, and 3/4 cup water; season with salt and pepper. (The mixture might look watery and not so appetizing. Forge ahead!)

4. Stuff poblano halves with bean mixture; place on top of sauce in baking dish. (If you have extra bean filling, you can add it to the dish.) Sprinkle poblanos with remaining 1/2 cup cheese; cover dish with aluminum foil.

5. Bake until poblanos are tender, about 45 minutes. Uncover, and continue to cook until sauce is thickened slightly and cheese is browned, 10 to 15 minutes more, rotating after 6 minutes. Let cool 10 minutes.

Thursday, November 19, 2009

Spiced Pork Tenderloin


I can't remember how I stumbled upon this recipe. I may have simply been browsing MyRecipes when it jumped out at me and noticed that it included items that I normally have on-hand, minus the pork tenderloin which is easy to acquire. I don't think that I've ever cooked pork tenderloin myself, though my dad likes to grill it. It came out so tender and flavorful but also very lean. Joe felt like he was getting a meat-centered meal, and I got to eat healthfully. The cinnamon and bourbon gave the pork a very seasonal taste. The recipe calls for grilling it, but I roasted mine in the marinade. I'm looking forward to preparing pork in other ways! I served this with steamed broccoli, garlic mashed potatoes from Trader Joe's, and beer bread.

Spiced Pork Tenderloin
source: My Recipes

Ingredients
2 tbsp sugar
2 tbsp bourbon
2 tbsp Worcestershire sauce
1/2 tsp cinnamon
1 (1 lb) pork tenderloin
salt and pepper to taste

Preparation

1. Preheat oven to 350-degrees.

2. Mix sugar, bourbon, Worcestershire, and cinnamon together in a bowl. Place pork tenderloin in a freezer bag and pour the marinade over the meat, sealing the bag to close. Let sit for 10 minutes (or slightly longer) turning to coat.

3. Spray 9x13 pan with cooking spray and add pork and marinade to the pan. Roast pork in oven until thermometer reaches 160-degrees (or about 30 minutes). Let rest for 5 minutes and carve into slices.

Thursday, November 12, 2009

Maple Ice Cream

November doesn't exactly seem like the best month to bust out the ice cream maker, but entries in Google Reader keep popping up with seasonally flavored ice cream like pumpkin, cinnamon, and, today's treat, maple. The maple flavor is not terribly strong, but it contains just a hint. I think maple extract would make it stronger. Like most custard-based ice creams with 5 egg yolks, this is intensely creamy and smooth. Joe and I have been enjoying our ice cream with a Maple Leaf Creme Cookie from Trader Joe's.

Maple Ice Cream
source: The Perfect Scoop via Erin's Food Files

Ingredients
1 1/2 cups whole milk
2 tablespoons sugar
1 1/2 cups heavy cream
5 large egg yolks
3/4 cup dark maple syrup
1/8 teaspoon coarse salt
1/4 teaspoon vanilla extract

Preparation

Warm milk and sugar in medium saucepan. Pour cream into a large bowl and set a mesh strainer on top.

In a separate medium bowl, whisk together the egg yolks. Slowly pour the warm mixture into the egg yolks, whisking constantly, then scrape the warmed egg yolks back into the saucepan.

Stir the mixture constantly over medium-low heat with a heatproof spatula, scraping the bottom as you stir, until the mixture thickens and coats the spatula. Pour the custard through the strainer and stir it into the cream to cool. Add the maple syrup, salt, and vanilla, and stir over ice bath until cool. Chill the mixture thoroughly in the refrigerator.

Freeze according to your ice cream maker’s instructions. Freeze until solid & scoopable.

Wednesday, November 11, 2009

Spicy Butternut and Peanut Soup

For my birthday, my wonderful mother-in-law gave me an immersion blender. When I received it in the mail, I immediately started planning a whole roster of soups for the next week's menu. I reconsidered, however, thinking that I might not want to go on a completely liquid-based diet for a week and that my husband might want to chew his dinner. I did keep this soup on the menu. I had saved it in January, and I knew the list of ingredients would satisfy Joe's and my love of spicy things with peanut butter.

Wow. This soup is the best soup I've ever made. Usually my soups turn out too something: watery, heavy on one ingredient, chunky, etc. I prefer soups of a uniform consistency, so I pureed the whole thing, and I love how you can taste all the flavors in one bite. Pureeing it also made it incredibly creamy. Joe was amazed there wasn't any cream in it. The flavors are so warm. It would be the perfect soup to curl up with on a cold night when you don't want something too heavy. The chipotle en adobo lends just a hint of heat and a lovely roasted flavor. I absolutely loved this soup and loved using my new immersion blender!

Spicy Butternut and Peanut Soup
source: Cara's Cravings

Ingredients
1 cup chopped onions
1 1/2 lbs peeled, diced butternut squash
6 cloves of garlic, minced
1 chipotle pepper in adobo sauce, minced
1 tsp ground cumin
1/2 tsp ground coriander
1/4 tsp ground ginger
1/4 tsp cinnamon
freshly ground salt & pepper
1 quart fat free, reduced sodium chicken broth (Or vegetable broth to make it vegetarian.)
14 oz can diced tomatoes
2/3 cup natural peanut butter
chopped cilantro for garnish

Preparation

Heat a large saucepan over medium-low heat. Spray with nonstick cooking spray and add onions. Cover and let them sweat for about 5 minutes, until softened, adjusting heat lower if they begin to brown. Add squash, garlic, chipotle pepper, and seasonings; stir and cook 2-3 minutes more. Add broth, tomatoes, and peanut butter, stirring well. Bring to a boil, then cover and reduce heat. Simmer for 15-20 minutes. Coarsely mash with a potato masher, or if you prefer a smoother texture, puree with an immersion blender or in a food processor. Serve with chopped cilantro.

Tuesday, November 10, 2009

Turkey Pumpkin Chili

I didn't actually make this. You see, last week Joe worked the night shift, so our time together was short or non-existent. The original plan was that Joe would help chop things up and then I would get home and make it, but time was of the essence, so he went ahead and followed the recipe. He did a wonderful job, and I hope that he'll take the lead more often in the kitchen!

Like most chilis, this was better the second day. I loved the hint of cinnamon and thought it brought out the pumpkin flavor. I thought it looked a little thick, so I added about a cup of pumpkin beer just to thin it out slightly. There is nothing quite like coming home to a delicious pot of chili on the stove!

Turkey Pumpkin Chili
source: Cara's Cravings

Ingredients
1 cup chopped onion
3 cloves of garlic, minced
2 medium sized peppers, diced
1 lb ground turkey
1 tbsp chili powder
2 tsp cumin
1 tsp cinnamon
1 tsp Mexican oregano
1 small can diced green chili peppers
15oz can black beans, drained and rinsed
1/2 cup frozen corn kernels
28 oz can crushed tomatoes
14 oz can diced tomatoes
15 oz can pumpkin puree, or 2 cups homemade

Preparation

Spray a large pot with nonstick cooking spray and place over medium heat. Add the onions and cook for about 5 minutes, until just softened. Add the garlic and bell peppers, and cook about 5 minutes more until tender. Add the ground turkey and cook until browned, breaking it up with a wooden spoon. Season with salt, pepper, chili powder, cumin, cinnamon, and oregano.

Stir in remaining ingredients, bring to a boil, then reduce heat and simmer for 20-30 minutes to blend flavors.

Or, just brown the turkey with the seasonings and combine with remaining ingredients in a crockpot and cook on low for 6-8 hours.

Serve with your favorite chili toppings - cilantro, green onion, cheese, sour cream, etc.

Monday, November 9, 2009

Feta, Mushroom, and Spinach Rotini

After a weekend of heavy eating, there's nothing that sounds better than a whole wheat pasta dish chock full of vegetables. I made this on a Sunday evening right after we returned from a glorious hike in Percy Warner Park. 4.5 miles of hills, fall leaves, and beautiful afternoon light on a clear day made us hungry. This dish doesn't knock you over the head with super-strong flavors but is a nice balance that allows you to taste each individual component. I added two links of chicken sausage for some protein.

Feta, Mushroom, and Spinach Rotini
source: Eat.Drink.Smile

Ingredients

8 oz whole wheat rotini (or other short) pasta
2 tsp olive oil
1/2 cup chopped onion
2 cloves garlic, minced
2 14 oz cans diced tomatoes, drained
2 cups sliced fresh mushrooms
10 oz bag baby spinach
4.5 oz can sliced black olives (optional) (I omitted)
salt and pepper to taste
2 tsp red pepper flakes
4 - 6 ounces good quality feta cheese, crumbled
2 links chicken sausage

Preparation

Bring a large pot of lightly salted water to a boil. Cook pasta in boiling water until al dente; drain.

Meanwhile, heat olive oil in a large skillet over medium-high heat; add onion and garlic, and cook until golden brown. After browning the garlic/onion mix, add the mushrooms and saute them before adding the tomatoes, spinach, and black olives. Season with salt, pepper, and red pepper flakes. Cook 2 minutes more, until tomatoes are heated through and spinach is wilted. Reduce heat to medium, stir in pasta and feta cheese, and cook until heated through.

Monday, November 2, 2009

Spinach, Mushroom, Ham, Feta Quiche

My favorite thing about quiche is that it's hard to mess up. Even though my turkey bacon was moldy and I forgot to get half-and-half at the store, this turned out really well. Feta has such a strong flavor that you don't have to use a ton of it, so this quiche is on the healthier spectrum of quiches but is also hearty enough to satisfy. Don't believe the hype that real men don't eat quiche!

Spinach, Mushroom, Ham, Feta Quiche
adapted from Erin's Food Files

Ingredients
1 frozen pie crust
1 thick slice of ham, diced
2 tsp olive oil
1/2 cup chopped onion
2 cups chopped spinach
1 cup chopped mushrooms
2 eggs
3 egg whites
2/3 cup milk
1/2 cup crumbled feta cheese
salt & pepper to taste

Preparation

Preheat oven to 375°.

Heat oil over medium to medium high heat. Add onion, saute 2-3 minutes until tender. Add mushrooms & spinach. Saute 4-5 minutes until spinach is soft. Add ham to the pan and stir to combine well.

In a bowl beat eggs, egg whites, and half & half. Season with salt & pepper. Add in veggie/ham mixture and stir to combine. Add feta, stir to combine, and pour into pie shell.

Bake 40-45 minutes or until completely set, and slightly golden & crispy on top.

Saturday, October 31, 2009

Vegetarian Chili Mac and Cheese

There is nothing quite as comforting as a big bowl of cheese and noodles. It's my two weaknesses together. The addition of beans and Ro-tel bulks it up and adds some color. The spices really give this dish some great flavor. Joe loved it, and it took much less time to make than I thought it would. Although not the healthiest, this will definitely be on the rotation as it gets colder.

Stovetop Vegetarian Chili Mac and Cheese
source: A Year in the Kitchen

Ingredients
1/2 red onion, minced
1 tbsp. olive oil
1 tbsp. butter
salt and pepper
2 tbsp. flour
2 c. milk
2 c. shredded cheddar cheese
6 oz. elbow macaroni
1 12 oz. can Ro-tel with lime and cilantro (I just used plain Ro-tel)
1 15 oz. can dark red kidney beans, drained and rinsed
1 tsp. coriander
2 tsp. cumin
2 tsp. chili powder
cilantro, for garnish

Preparation
Bring a large pot of water to a boil, salt and add pasta.
Heat a deep skillet over medium.
Add onion, EVOO and butter. Season with salt and pepper.
Sweat out onions for 2-3 minutes, sprinkle flour over onions and whisk to cook off flour.
Add milk, turn heat to high and bring to a bubble.
Drain rotel and add to the milk, whisk in cheddar cheese and spices.
Once cheese is melted and incorporated, add beans.
Drain macaroni and add to the pot.
Stir well, serve with cilantro.

Monday, October 26, 2009

Creamy Pea and Artichoke Pesto Pasta Salad

This weekend was pretty busy and exciting. On Saturday, a few of us surprised Mrs. Sac of Mrs. Sac's Purple Kitchen with a baby shower. The theme was 3 peas in a pod since she is expecting triplets, and I was asked to bring a salad with peas in it. I remembered that I had starred this recipe in my Google Reader, and even though it uses a lot of spring ingredients, I figured it would be perfect for this occasion. We had a wonderful time, and everyone loved the pasta salad. Thanks to Erin from Erin's Food Files for the gorgeous picture!

Creamy Pea and Artichoke Pesto Pasta Salad
source: Closet Cooking

Ingredients
8 oz penne pasta
1 cup pesto
1/3 cup mayonnaise
1 cup peas
1 cup artichoke hearts

Preparation
1. Cook the pasta according to package directions and rinse with cold water.
2. Mix the pesto and mayonnaise in a bowl.
3. Toss pesto mixture with pasta, along with the peas.
4. Fold in the artichoke hearts.
5. Let chill in the refrigerator for 20 minutes or more. (I made this the day before.)
6. Serve with grated Parmesan cheese if desired.

Wednesday, October 21, 2009

Pumpkin Walnut Bread

Last year I made this pumpkin chocolate chip bread over and over again because I loved it so much. So this year I wanted to try some other recipes before I reverted to the old one. I trusted Elise at Simply Recipes to guide me, and I was not disappointed. Allspice is quickly becoming a favorite spice of mine, and this bread has a healthy dose of it. I asked Joe which bread he liked better, and he said that he would have to do a side-by-side comparison. I love the walnuts in this as well, though it probably isn't as healthy as the pumpkin chocolate chip bread with it's 1/2 cup of oil.

Pumpkin Bread
source: Simply Recipes

Ingredients
1 1/2 cups (210g) flour
1/2 teaspoon of salt
1 cup (200 g) sugar
1 teaspoon baking soda
1 cup (1/4 L) pumpkin purée*
1/2 cup (1 dL) olive oil
2 eggs, beaten
1/4 cup water
1/2 teaspoon nutmeg
1/2 teaspoon cinnamon
1/2 teaspoon allspice
1/2 cup (1 dL) chopped walnuts

Preparation

1 Preheat oven to 350°F (180°C). Sift together the flour, salt, sugar, and baking soda.

2 Mix the pumpkin, oil, eggs, 1/4 cup of water, and spices together, then combine with the dry ingredients, but do not mix too thoroughly. Stir in the nuts.

3 Pour into a well-buttered 9x5x3 inch loaf pan. Bake 50-60 minutes until a thin skewer poked in the very center of the loaf comes out clean. Turn out of the pan and let cool on a rack.

Makes one loaf. Can easily double the recipe.

Sunday, October 18, 2009

Creamy Pumpkin Penne

I keep thinking that this picture looks a little orange and then remembering that it IS orange. I believe that this was my first savory dish using pumpkin, and I am a fan. The richness of the blended cottage cheese makes this sauce seem a lot more indulgent than it actually is. I switched out the chicken sausage for some mild Italian sausage links that I needed to use, so it isn't quite as healthy as the original. If you do this, cook the sausage through before adding the garlic and onions. The spinach is a great addition for color and heft. Plus, this meal came together quickly. It was like eating a gourmet meal at home!

Creamy Pumpkin Penne
source: Cara's Cravings

Ingredients
4 oz whole wheat penne pasta
2 tsp olive oil
1 small onion, thinly sliced
2 cloves of garlic, minced
about 2T chopped fresh sage
2 links cooked chicken sausage, sliced
1/2 cup low fat cottage cheese (1% milk fat)
1/2 cup pumpkin puree
1/2 cup nonfat milk
pinch of nutmeg
5oz torn spinach, thick stems removed
grated parmesan or pecorino romano cheese, optional

Preparation
Heat olive oil in a skillet over medium-low heat. Add onions and cook gently for about 10-15minutes, until softened and beginning to caramelize. Add garlic, sage, and chicken sausage; continue to saute.

Meanwhile, cook pasta according to package directions.

In a blender, combine combine pumpkin, cottage cheese, and milk. Blend until no lumps are present. Add to sausage mixture in skillet and continue to cook over low heat. Season to taste with salt and freshly ground pepper, and a pinch of nutmeg.

Drain pasta and return to pot over low heat. Add sausage mixture and baby spinach, and toss together. Cover for a few minutes to let the spinach wilt. Serve with parmesan cheese, if desired.

Saturday, October 17, 2009

Birthday Dinner at Delvin Farms

When Joe asked me what I wanted for my 25th birthday this year, I told him that I would love to do one of the special dinners that had been popping up around town. Usually a special prix-fixe type of menu with wine or beer (or even tequila or rum) pairings, they tended to cost a little bit more than we would spend for a normal night out. I said I would keep an eye out for any dinners like that around my birthday weekend. Shortly afterward, this dinner popped up, scheduled for my birthday evening. A special menu prepared by Chef Jeremy Barlow of tayst using local fruits and vegetables, including wine, benefiting Food Security Partners of Middle Tennessee, and taking place amidst the pines at Delvin Farms, a local farm just south of town that has a very popular CSA program and large presence on the local food scene.

We arrived, and our car was valet parked while we walked down a dirt path through the pine trees, stopping for a glass of wine at the tent. The weather was absolutely perfect with clear skies and a slight fall chill. When we passed into the pine trees, there was a magical clearing with tables set up. I kept expecting to have woodland creatures come out to serve us.

Fortunately, there were also space heaters, as when the sun went down, it got a little chilly. We stood around and chatted while we drank wine and waited for the passed hors d'oeuvres to come out.

The menu was quintessentially fall food. The roast pig was succulent and moist. The lettuce salad was much loved by everyone at our table for its textural contrasts and the surprisingly creamy sweet potato dressing. I particularly enjoyed the pasta salad with its touch of sweetness from the sorghum and figs. The fall squash napoleon was topped with fresh ricotta and was similar in texture to a savory pumpkin pie. The cornbread was not too sweet or too dry. Everything was just perfect. Unfortunately, it had become quite dark by the time we ate, so I have no pictures of the main dinner food or dessert. Since the dinner, I have dreamed of the caramel from the caramel apples for dessert. I don't usually like caramel as I find it cloyingly sweet, but this caramel was rich and smooth.

Admittedly, the passed bites were my favorite part. Above you see me with a caramel cone full of spicy apple relish. The cone was delicate and sweet without being sticky, and the peppers in the relish contrasted beautifully with the sweetness of the apples.

The smoked trout hush puppies covered in wildflower honey were to die for. I could have made a meal out of them alone. The rich smoky flavor of the trout was juxtaposed with the slightest sweetness of the honey. The white grit cakes were topped with sauteed kale and local goat cheese, and the goat cheese just melted in my mouth.

It was a wonderful birthday and a unique experience that I will treasure for a long time.

Wednesday, October 14, 2009

Swirled Pumpkin-Bourbon Cheesecake Squares

I'm so pleased that it's fall again, and I can revisit recipes that I saved from last year and never got around to making them. The funny thing is that I even bought gingersnap cookies at the end of last fall to make the crust for this and still didn't make them. Last Friday, we had plans with some friends for dinner, and I offered to bring dessert. When I was calling out saved recipes to Joe, he zeroed in on this one. Who wouldn't? I had him at bourbon.

These don't have a very strong pumpkin flavor, but they're nice and creamy in addition to being festive. The bourbon flavor really comes through in the crust. It's almost like making a cheesecake but without nearly so much effort. These were a hit, and I'm glad I finally got around to making them.

Swirled Pumpkin-Bourbon Cheesecake Squares
source: Kelsey's Apple A Day

Ingredients
For crust:
about 20 gingersnaps, broken into large pieces

1/4 c. granulated sugar

3 TBSP butter, melted

1 TBSP bourbon


Cheesecake Filling:

11 oz. low-fat cream cheese, at room temperature

1/4 c. low-fat sour cream

1/3 c. granulated sugar

1 TBSP all-purpose flour

1 large egg

1/2 tsp. vanilla extract

1/2 c. pumpkin puree

1 TBSP (packed) dark brown sugar

3 TBSP bourbon

Preparation

1. Preheat oven to 325 F. Line the bottom and sides of a 9x9x2 in. square pan with foil. Spray the foil with non-stick cooking spray.


2. To make the crust: Process the gingersnaps in a food processor until very finely chopped. You should have one cup of crumbs. Combine crumbs, sugar, butter, and bourbon. Pat into an even layer in the bottom of the pan. Bake for 7 minutes. Cool on a rack.


3. To make the filling: Beat the cream cheese, sour cream, granulated sugar, and flour in the bowl of a stand mixer fitted with the paddle attachment. Add egg, vanilla, and bourbon and beat until smooth.


4. Scoop 3/4 c. of the cream cheese mixture into a medium bowl and stir in pumpkin puree and brown sugar.


5. Spoon the plain cream cheese mixture evenly over the crumb layer in the pan. Dollop pumpkin mixture on top and swirl with a fork to make a decorative design.


6. Bake for 25-30 minutes, or until firm in the middle when gently shaken (Mine took about 35-40 minutes). Cool in the pan for one hour. Chill thoroughly.

7. To serve, lift cheesecake and foil from pan. Cut into squares.

Saturday, October 10, 2009

Ham and Cheese Corn Muffins

I'm always looking for freezable, portable breakfast ideas for Joe, and I thought I hit the jackpot when I found the Oatmeal Breakfast Clafoutis. However, man cannot eat oatmeal breakfast clafoutis forever, and this recipe from the October 2009 Cooking Light looked like a good, savory counterpart. Joe has enjoyed them so far and likes the heft that the cornmeal gives the muffins as well as the zing that the ground red pepper and green onions add. The ham helps keep him satisfied, which is great since sometimes he can go 7-8 hours between when he eats breakfast and his lunch break. They freeze and defrost beautifully. I did sort of "unhealthify" these, and my changes are reflected below. These would also go well beside chili or another hearty soup.

Ham and Cheese Corn Muffins
source: Cooking Light October 2009

Ingredients
1 2/3 cups all-purpose flour
1 cup yellow cornmeal
1 tbsp sugar
1 1/4 tsp baking soda
1/2 tsp salt
1/8 tsp ground red pepper
1 1/4 cups low-fat buttermilk
2 eggs
3 tbsp canola oil
3/4 cup shredded sharp cheddar cheese
1/2 cup finely chopped green onions
1/2 cup frozen whole-kernel corn, thawed
1/2 cup diced ham
Cooking spray

Preparation
  1. Preheat oven to 350-degrees.
  2. Combine flour, cornmeal, sugar, baking soda, salt, and red pepper in a medium bowl, stirring with a whisk. Form a well in the center of the mixture. In a separate bowl, combine buttermilk, egg, and oil. Pour into well in flour mixture, stirring until moist. Do not overmix. Gently fold in cheese, green onions, corn, and diced ham.
  3. Coat 12-cup muffin pan with cooking spray and spoon batter into each well. Bake at 350-degrees for 23 minutes or until a toothpick comes out clean. Remove muffins from pan and place on a wire rack to cool.

Friday, October 9, 2009

Tres Leches Flan Cake

We had our housewarming party last Saturday, and I wanted to make a cake that was slightly different, would stand out, and did not require any artistic decorating. Cue the bundt pan and this recipe that I've had squirreled away since last September. This was the perfect time for it. I was worried that it wouldn't come out okay, but it worked absolutely beautifully and everyone loved it.

Yes, that is cake with a layer of flan on top. The cake is deliciously moist, and the flan is a nice textural contrast to the cake. This will impress everyone at your next gathering and doesn't require too much extra effort. Be sure to pour the flan mixture slowly down the side of the pan so it sinks to the bottom. My cake came out of the pan as soon as I flipped it over; I didn't have to wait for it to warm to room temperature.

Tres Leches Flan Cake
source: Joelen's Culinary Adventures

Ingredients

Cake:
1 (18.25 oz.) box butter/yellow cake mix and ingredients to prepare as directed on box
1 (12 oz) can of regular Coke or Pepsi

Topping:
1 (10.9 oz) jar of cajeta or caramel ice cream topping

Flan:
1 (14 oz.) can sweetened condensed milk
1 (12 oz.) can evaporated milk
3 eggs
1 tablespoon vanilla extract

Preparation

Heat oven to 350 degrees

Follow instructions to make cake, but use the can of coke instead of water. Set cake mix aside and make flan by putting the flan ingredients in a blender and mixing well.

Spray the bundt pan with Pam and then cover the bottom with caramel

Pour cake mix into bundt pan.

Pour the flan mix gently down one side of the pan. The flan will go to the bottom and the cake mix will raise up a bit as the flan mixture fills the bottom of the pan.

Set the bundt pan in a larger pan or tray with water. (I used a roaster.) You are creating a double boiler, but you only need a couple inches of water.

Put it all in the oven and it will cook for at least 45 minutes and as much as an hour.

Check the cake doneness with a toothpick. The cake will stay more moist than most cakes you've ever made and you will see it separate a bit from the pan when it is done.

Let is cool and refrigerate for several hours.

Take it out two hours before you plan to serve. Turn the bundt pan over and let it sit while warming to room temperature.

The bundt pan should then lift off to reveal a layer of flan, topped with caramel sitting atop a very moist cake.

Friday, October 2, 2009

White Bean Turkey Chili


October is my favorite month. It's my birthday month and the real beginning of fall. What better way to celebrate the beginning of October than with chili! I enjoyed this chili very much. It's basically lean protein and vegetables, so I felt pretty good about the health factor, and the beer added a lot of flavor. It's not too spicy and the flavor overall is very balanced and subtle. I might add another teaspoon of chili powder in there next time. Serve with avocado, sour cream, and cheese.

White Bean Chicken Chili
source: Lime in the Coconut

Ingredients
1 small onion, diced
1 green pepper, diced
1 red pepper, diced
3 cloves garlic, minced
1 tablespoon chili powder
1 teaspoon cumin
pinch of cardamom
pinch of allspice
1 tsp olive oil
1 lb ground turkey meat
1 can white beans, drained and rinsed
1 can of fire roasted diced tomatoes
1/2 bottle of beer
salt and pepper

Preparation
In a soup pot or dutch oven, pour in your olive oil along with your diced veggies and garlic. Saute until tender. Add your spices and chicken meat. Cook until meat is well browned.
Add in your beans, tomatoes and beer. Season with salt and pepper and bring to a boil. Turn down to a simmer and let it stew for 30 minutes on low heat. If it's too runny you can add a little cornstarch or tomato paste to thicken it up. Once ready, serve in bowls and top with garnish.

Wednesday, September 30, 2009

Portobello-Broccoli Stir-Fry

This stir-fry is chock full of nutrients, which makes up for the white rice. Mushrooms offer a lot of selenium, and red bell peppers have a ton of vitamin C, as does broccoli. I felt healthier after eating this! The sauce is a fairly standard brown stir-fry sauce, and I felt that it could've used some more hoisin sauce. I also added Sriracha for a bit of a kick.

Portobello-Broccoli Stir-Fry
source: Eat Better America

Ingredients

1 1/3cups uncooked regular long-grain white rice
2 2/3cups water


1/4cup water
2tablespoons soy sauce
1tablespoon hoisin sauce
2teaspoons cornstarch
1teaspoon honey

1(6-oz.) pkg. portobello mushroom caps
1medium onion, cut into thin wedges
1small red bell pepper, cut into thin strips
1garlic clove, minced
3cups fresh broccoli florets (about 6 oz.)
1/4cup water

Preparation
1. Cook rice in 2 2/3 cups water as directed on package. Cover to keep warm.
2.Meanwhile, in small nonmetal bowl, combine all sauce ingredients; blend well. Set aside.
3.With small metal spoon, scrape underside of mushroom caps to remove dark gills and stems. Cut mushroom caps into 3/4-inch pieces.
4.Spray large nonstick skillet with nonstick cooking spray. Heat over medium-high heat until hot. Add mushrooms, onion, bell pepper and garlic; cook and stir 3 minutes.
5.Add broccoli and 1/4 cup water; cover and cook 3 to 5 minutes or until vegetables are crisp-tender, stirring occasionally. Add sauce; cook and stir 2 to 3 minutes or until bubbly and thickened. Serve over rice.