Showing posts with label lighter. Show all posts

Tuesday, April 5, 2011

Ricotta and Spinach Frittata

Oh April. You have arrived in all of your schizophrenic glory – beautiful sunny days followed by epic thunderstorms. April showers not only bring May flowers but also tornado sirens, downed power lines, and lengthy commutes while everyone figures out how do navigate four-way stops when the traffic lights are out.

Monday afternoon, as a dark, threatening cloud approached, everyone in the student recreation center was told to report to the women’s locker room, where we camped out for 30 minutes. I had little patience for the complaints of the undergraduates whose workouts had been interrupted since Twitter was reporting sightings of several funnel clouds. Fortunately, we were safe, and my house didn’t lose power. Joe said they had to move all of the patients on the OB floor out into the hallway, which must’ve been quite an experience.

Arriving home to find that I did indeed have power, a spring dinner in honor of the crazy spring weather seemed to be appropriate. Fresh greens, fluffy ricotta cheese, and citrusy mint affirm that spring is here to stay, though I could do without the tornado sirens. For the first time, I was successful at picking up the edges of the frittata to let the uncooked egg flow underneath. The key was a good amount of oil and letting the pan heat up. The fresh mint really flavors the dish, but any other flavorful fresh herb would fit as well.

CIMG1167

Ricotta and Spinach Frittata
source: New York Times
Yields 4 dinner-sized servings

Ingredients
6 ounces fresh spinach, stemmed and washed, or 1/2 6-ounce bag baby spinach
6 eggs
Salt and freshly ground pepper
1 cup fresh ricotta
1 tablespoon chopped fresh mint
1 garlic clove, minced
2 tablespoons olive oil

Preparation

1. Steam the spinach above 1 inch of boiling water just until it wilts, about two minutes. Rinse with cold water, squeeze out excess moisture and chop fine.
2. In a medium bowl, beat together the eggs, salt, pepper, ricotta, garlic, spinach and mint.
3. Heat the olive oil over medium-high heat in a heavy 10-inch nonstick skillet. Drop a bit of egg into the pan; if it sizzles and cooks at once, the pan is ready. Pour in the egg mixture. Tilt the pan to distribute the eggs and filling evenly over the surface. Shake the pan gently, tilting it slightly with one hand while lifting up the edges of the frittata with the spatula in your other hand, to let the eggs run underneath during the first few minutes of cooking.
4. Turn the heat down to low, cover and cook 10 minutes, shaking the pan gently every once in a while. From time to time, remove the lid, tilt the pan and loosen the bottom of the frittata with a wooden spatula so that the bottom doesn’t burn. It should turn a golden color. The eggs should be just about set; cook a few minutes longer if they’re not.
5. Meanwhile, heat the broiler. Uncover the pan and place under the broiler, not too close to the heat, for one to three minutes, watching very carefully to make sure the top doesn’t burn (at most, it should brown very slightly and puff under the broiler). Remove from the heat, shake the pan to make sure the frittata isn’t sticking, and allow it to cool for at least five minutes and for as long as 15 minutes. Loosen the edges with a wooden or plastic spatula. Carefully slide from the pan onto a large round platter. Cut into wedges or into smaller bite-size diamonds. Serve hot, warm, at room temperature or cold.

Monday, May 24, 2010

Strawberry, Pistachio, and Goat Cheese Pizza

In Houston, there was this restaurant right around the corner from my apartment that, in addition to some killer margaritas, had this salad on the menu that included a sort of cheesy pita bread under all of the salad. It was like you were rewarded for eating your salad with some delicious, cheesy flatbread. This pizza is a little bit like that in concept because it's not really a traditional pizza with sauce and cheese and toppings. It's more like salad on top of bread, with which, as I learned from that salad in Houston, there is absolutely nothing wrong.

I had bookmarked this last year as part of a fictional backyard cookout menu that we never got around to hosting. Because, you know, it's totally normal to plan menus for parties that you don't actually have. It was brought to my attention again by Coach Nicole from Sparkpeople, and I decided that this time I would actually make it.

The goat cheese melts a little on the hot crust, and this is just a lovely spring supper with a glass of white wine. It would also make a nice appetizer for a not-so-fictional outdoor party. I substituted arugula for the watercress and really enjoyed the peppery bite of the arugula with the cool sweetness of the strawberries.

Strawberry, Pistachio, and Goat Cheese Pizza
source: Cooking Light May 2009
Serves 6

Ingredients
1 12 oz prebaked whole wheat pizza crust
1/3 cup crumbled goat cheese
1 cup sliced strawberries
1 cup trimmed watercress (or arugula or spinach)
1/2 tsp olive oil
1/2 tsp fresh lemon juice
salt and pepper
1/4 cup shaved fresh Parmigiano-Reggiano cheese
3 tbsp shelled, dry-roasted pistachios, chopped

Preparation
1. Preheat oven to 425-degrees.
2. Place crust on a baking sheet or pizza stone. Bake for 8 minutes. Remove crust from oven and sprinkle goat cheese evenly over the crust.
3. Combine strawberries, watercress, olive oil, juice, salt, and black pepper; toss gently to coat. Arrange strawberry mixture evenly over goat cheese. Sprinkle pizza with Parmigiano-Reggiano and nuts. Cut into 12 wedges. Serve immediately.

Saturday, January 2, 2010

Hamburger Buddy

Oh, comfort food. Somehow, it's those things from childhood that we tend to crave during stressful times or the cold, dark days of winter. This meal is a take on Hamburger Helper but adds a healthy spin with the addition of a pureed vegetable mix of carrots, onions, and mushrooms. Perfect for a picky child or husband, this will fill you up but not weigh you down. With a side salad, you'll have even more vegetables on your plate! I found it a tad on the bland side, so it perhaps needs a little more thyme and salt, but you can add whatever other spices or herbs you think would go well with it.

Hamburger Buddy
source: Eating Well
Yields 6 servings

Ingredients
  • 3 cloves garlic, crushed and peeled
  • 2 medium carrots, cut into 2-inch pieces
  • 10 ounces white mushrooms, large ones cut in half
  • 1 large onion, cut into 2-inch pieces
  • 1 pound 90%-lean ground beef
  • 2 teaspoons dried thyme
  • 3/4 teaspoon salt
  • 1/4 teaspoon freshly ground pepper
  • 2 cups water
  • 1 14-ounce can reduced-sodium beef broth, divided
  • 8 ounces whole-wheat elbow noodles, (2 cups)
  • 2 tablespoons Worcestershire sauce
  • 2 tablespoons all-purpose flour
  • 1/2 cup reduced-fat sour cream
  • 1 tablespoon chopped fresh parsley, or chives for garnish
Preparation
  1. Fit a food processor with the steel blade attachment. With the motor running, drop garlic through the feed tube and process until minced, then add carrots and mushrooms and process until finely chopped. Turn it off, add onion, and pulse until roughly chopped.
  2. Cook beef in a large straight-sided skillet or Dutch oven over medium-high heat, breaking it up with a wooden spoon, until no longer pink, 3 to 5 minutes. Stir in the chopped vegetables, thyme, salt and pepper and cook, stirring often, until the vegetables start to soften and the mushrooms release their juices, 5 to 7 minutes.
  3. Stir in water, 1 1/2 cups broth, noodles and Worcestershire sauce; bring to a boil. Cover, reduce heat to medium and cook, stirring occasionally, until the pasta is tender, 8 to 10 minutes.
  4. Whisk flour with the remaining 1/4 cup broth in a small bowl until smooth; stir into the hamburger mixture. Stir in the sour cream. Simmer, stirring often, until the sauce is thickened, about 2 minutes. Serve sprinkled with parsley (or chives), if desired.

Tuesday, December 29, 2009

Ancho Pork and Hominy Stew

Like many others, I overindulged this holiday season. Add to that an unusually stressful semester at school, which led to some stress-eating during finals, and stepping on the scale yesterday was not a pretty sight. But in the middle of winter, who wants a salad? This is the time of year when I crave thick, hearty stews and regular "diet" food is not going to do it for me.

Yet again, Cooking Light to the rescue. This stew is only 300 calories per serving but is immensely filling and flavorful. I consider a meal a success when Joe asks if he can take the leftovers for lunch. After two bites of this stew, he asked if he could take the leftovers for the next few days! Joe's Christmas present to me was a beautiful red, oval-shaped, 6 qt enameled cast iron Dutch oven, and it was the perfect vessel for this stew. During the searing of the pork, those lovely little brown bits stuck to the bottom of the pot and were scraped into the broth, adding a ton of flavor. I served this with the jalapeno corn bread recommended by Cooking Light, made in my cast iron skillet. Follow the link for additional nutritional information and the cornbread recipe.

Ancho Pork and Hominy Stew
source: Cooking Light December 2009
Yields 6 servings

Ingredients
2 tbsp ancho chile powder (or other high-quality chili powder. I used Penzey's Chile 3000.)
2 tsp dried oregano
1 1/2 tsp smoked paprika
1 tsp ground cumin (I halved the cumin because I used regular chili powder.)
1/2 tsp salt
1 1/2 lbs pork tenderloin, trimmed and cut into 1/2-inch pieces
1 tbsp olive oil, divided
2 cups chopped onion
1 1/2 cups chopped green bell pepper
1 tbsp minced garlic
2 1/2 cups fat-free less-sodium chicken broth
1 28 oz can hominy, drained
1 14.5 oz can fire-roasted diced tomatoes, undrained

Preparation

1. Combine dry spices in a large bowl and set aside 1 1/2 tsp of spice mixture. It will be added in later. Toss the pork pieces with the spices until thoroughly coated.

2. Heat 2 tsp oil in a Dutch oven over medium-high heat, and add pork mixture to pan. Cook about 5 minutes, stirring occasionally, or until browned. Remove pork from the pan and set aside.

3. Add remaining 1 tsp oil. Add onion, bell pepper, and garlic. Cook 5 minutes, stirring, or until tender. Add pork back into the pan, along with the reserved spice mixture. Add broth, hominy, and tomatoes. Bring contents to a boil, then reduce to a simmer. Partially cover and simmer for at least 25 minutes.

Tuesday, April 28, 2009

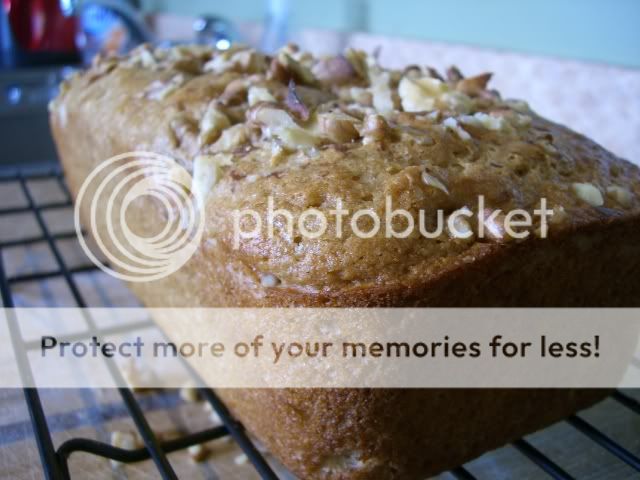
Maple and Walnut Quick Bread

My Cooking Light magazines have a terrible habit of arriving in the mail right during my most hectic times at school when I should be studying instead of perusing magazines. This month was no exception, though it was an exceptional issue. I found myself flagging tons of recipes. All the food looked so seasonal and fresh and light. Plus a lot of it used ingredients I have on hand or know where to get.

I was up early Sunday morning before church with little to no appetite for anything in the house when I remembered this quick bread recipe in the Cooking Light issue so I whipped it up for later. I'm a sucker for quick breads but they often have quite a bit of oil and sugar in them. Without any walnut oil, I substituted applesauce, though I would definitely recommend the walnut oil.

The flavor in this loaf is very subtle, and I would say that the maple flavor develops better the next day. The crunchiness of the walnuts on top add a great textural balance to the chewy loaf. This was featured in a spread about healthy fats and noted that walnuts are a great source of poly-unsaturated fats. Plus they taste delicious!

Maple and Walnut Quick Bread
source: May 2009 issue

Ingredients
1 1/4 cup all-purpose flour
3/4 cup whole-wheat flour
1/2 cup sugar
2 tsp baking powder
1/2 tsp baking soda
1/2 tsp salt
1 cup low-fat buttermik
1/3 cup maple syrup
1/4 cup walnut oil
1 large egg
1/2 tsp vanilla extract
Cooking spray
1/3 cup finely chopped walnuts, toasted

Preparation
  1. Preheat oven to 350-degrees and grease an 8x4 inch loaf pan.
  2. Combine flours, sugar, baking powder, baking soda, and salt in a large bowl.
  3. Combine buttermilk, syrup, oil, and egg in a separate bowl.
  4. Making a well in the center of the dry mixture, pour the wet mixture into the center of the dry mixture, stirring just until moist. Stir in vanilla.
  5. Spoon batter into the loaf pan and sprinkle with walnuts.
  6. Bake at 350-degrees for 50 minutes or until a toothpick inserted in the center comes out clean. Cool in pan for 10 minutes on a wire rack; remove from pan. Cool completely on wire rack.
Yield: 1 loaf, serving size: 1 slice
Calories 178; Fat 6.5 g (sat 0.8g, mono 1.4g, poly 3.9g); Protein 3.6 g; Carb 27.5 g; Fiber 1.3 g; Chol 16 mg; Iron 1.1 mg; Sodium 224 mg; Calc 73 mg

Tuesday, January 27, 2009

Light Buttermilk Pancakes with Blueberries

These are the best pancakes I have ever had outside of Pancake Pantry here in Nashville. This recipe makes the lightest, fluffiest pancakes, and the buttermilk contributes such a rich flavor. I threw in some frozen blueberries that I had in the freezer and served these with some turkey bacon for a Sunday morning breakfast that didn't break the calorie bank but still felt indulgent. I did have a slight problem with the pancakes cooking all the way through. They get so puffy that it's hard to tell when the inside is cooked, so leave them on a little longer than you might normally.

Light Buttermilk Pancakes
source: Cheap Healthy Good
Makes 8-10 pancakes

Ingredients
1 cup all-purpose flour
2 tablespoons sugar
1 teaspoon baking powder
½ teaspoon baking soda
1/4 teaspoon salt
1 cup low-fat buttermilk
1 teaspoon vegetable oil
1 large egg, lightly beaten
Cooking spray
(I added about a 1/2 cup of frozen blueberries.)

1) Lightly spoon flour into a dry measuring cup; level with a knife. Combine flour and next 4 ingredients (flour through salt) in a large bowl, and make a well in center of mixture. Combine buttermilk, oil, and egg; add to flour mixture, stirring until smooth.

2) Spoon about 1/4 cup batter onto a hot nonstick griddle or nonstick skillet coated with cooking spray. Turn pancakes when tops are covered with bubbles and edges look cooked

Tuesday, September 30, 2008

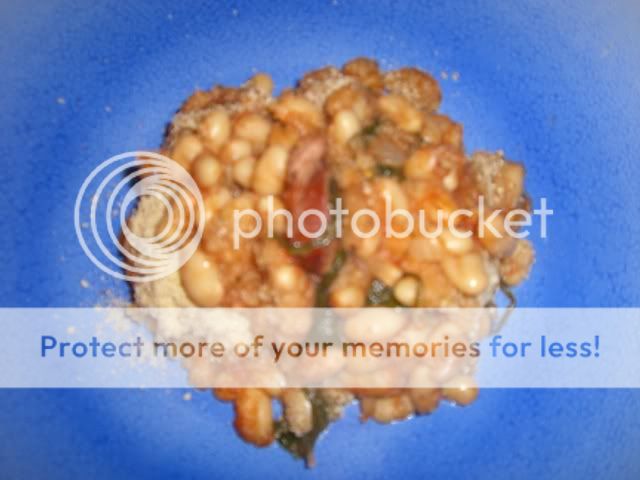
Sausage Bean Casserole

This dinner was surprisingly flavorful. I'm not sure why I expected that it wouldn't be; it just seemed like there wasn't a strong flavor profile when I was making it. I really like the idea of casseroles, but with most of them having a base of pasta or rice, they're just too starchy to have on a regular basis. Cooking Light to the rescue, yet again. This casserole has a base of beans! Ingenious! I followed Brooke's lead and threw some spinach in there for a little green.

This is another great weeknight meal that doesn't require a lot of time or energy and yet tastes like you spent all day in the kitchen. And it makes plenty of leftovers for lunch the next day.

Sausage and Bean Casserole
source: Cooking Light via Brooke

Ingredients

Cooking spray
1 cup chopped onion (about 1 medium)
1 (16-ounce) package light smoked turkey sausage (such as Hillshire Farm), cut into 1/4-inch-thick slices (I used a 14 oz package because that's what was on sale.)
2 garlic cloves, minced
1 (14-ounce) can fat-free, less-sodium chicken broth
2 tablespoons brown sugar
2 tablespoons tomato paste
1/2 teaspoon dried thyme
1/2 teaspoon freshly ground black pepper
3 (16-ounce) cans cannellini beans or other white beans, rinsed and drained
1 bay leaf
1/8 teaspoon ground red pepper (optional) (I used a 1/2 tsp crushed red pepper.)
3 (1-ounce) slices white bread (I used pre-made breadcrumbs.)
2 tablespoons chopped fresh parsley (I omitted.)

Preparation

Preheat oven to 375°.
Heat a Dutch oven over medium-high heat. Coat pan with cooking spray. Add onion and turkey sausage to pan; sauté for 5 minutes or until browned. Add garlic, and sauté for 2 minutes. Stir in chicken broth, scraping pan to loosen browned bits. Stir in 2 tablespoons brown sugar, tomato paste, dried thyme, freshly ground black pepper, cannellini beans, and bay leaf. Add ground red pepper, if desired. Bring to a boil; cover, reduce heat, and simmer for 5 minutes. Remove from heat. (I don't have a Dutch oven, so I cooked the mixture in a stockpot and then transfered it to a 9x13 Pyrex dish to bake.)
Place bread in a food processor, and pulse 10 times or until coarse crumbs measure 1 1/2 cups.
Sprinkle breadcrumbs evenly over bean mixture, and lightly coat with cooking spray. Bake at 375° for 15 minutes or until browned. Discard bay leaf. Sprinkle with parsley.

Yields: 8 servings

Calories: 205 (14% from fat), Fat: 3.3g (sat 1.1g,mono 0.1g,poly 0.5g), Protein: 12.1g, Carbohydrate: 30g, Fiber: 4.4g, Cholesterol: 25mg, Iron: 2.7mg, Sodium: 823mg, Calcium: 77mg

Monday, September 29, 2008

Chocolate Chip Pumpkin Bread


Sheesh, what's with all this chocolate pumpkin nonsense? Don't you make real food anymore? Actually, I swear I had a good reason to make this bread. The music director at the church Joe and I have been going to was leaving, and Sunday was his last day. Since I sing in the choir, the choir was responsible for the food for the reception after the service.

This recipe makes two loaves, so if I hadn't been taking it to church, I probably would have halved the recipe. Fortunately, I made both loaves because the bread went quickly, and Joe was disappointed at how little there was left. Maybe this is sad, but it was definitely a boost to my self-esteem to see people keep reaching for my bread.

(Oh, and I so want to make a "loaves and fishes" joke, but I'll spare you.)

You seriously want to make this bread. Words cannot describe how moist and flavorful it is, the way the chocolate melds with the pumpkin spice. Did I mention it's a Cooking Light recipe?


Chocolate Chip Pumpkin Bread
source: Cooking Light via Brooke

Ingredients
2 cups sugar
2 cups canned pumpkin
1/2 cup canola oil
1/2 cup fat-free vanilla pudding (I used fat-free plain yogurt + 1 tsp of vanilla extract)
4 large egg whites (I used 2 eggs)
3 cups all-purpose flour
2 teaspoons ground cinnamon
1 1/4 teaspoons salt
1 teaspoon baking soda
1 cup semisweet chocolate chips
Cooking spray

Preparation
Preheat oven to 350°.
Combine first 5 ingredients in a large bowl, stirring well with a whisk. Lightly spoon flour into dry measuring cups; level with a knife. Combine flour, cinnamon, salt, and baking soda in a medium bowl, stirring well with a whisk. Add flour mixture to pumpkin mixture, stirring just until moist. Stir in chocolate chips.
Spoon batter into 2 (8 x 4-inch) loaf pans coated with cooking spray. Bake at 350° for 1 hour and 15 minutes or until a wooden pick inserted in the center comes out clean. Cool 10 minutes in pans on a wire rack, and remove from pans. Cool completely on wire rack.

Yield: 32 servings (serving size: 1 slice)

Nutritional Information:
CALORIES 152(30% from fat); FAT 5g (sat 1.2g,mono 2.5g,poly 1.1g); PROTEIN 2g; CHOLESTEROL 0.0mg; CALCIUM 10mg; SODIUM 137mg; FIBER 1.1g; IRON 1mg; CARBOHYDRATE 26.5

Sunday, August 10, 2008

Walnut-Encrusted Tilapia with Steamed Broccoli and Red Potatoes


Eating more seafood is something that's always on my nutritional to-do list, but it never seems to happen. I really like seafood, but it's usually more expensive than other proteins and sometimes difficult and time-consuming to prepare, like in the case of cooking and shelling shrimp. Last week I was in the grocery store and saw a 3 lb bag of tilapia for $9.99. I was sold. These turned out to be some good-looking tilapia fillets too. I've had some that were so puny, you needed two per serving to make a real meal.

Fortunately, I also stumbled upon a delicious-looking recipe courtesy of Joelen. I changed it up a little and subbed walnuts, which I had on hand from the Lentil Walnut Burgers, for her macadamia nuts.

This turned out really well, and it wasn't too hard to throw together for a nice Friday night dinner. I served it with steamed broccoli and red potatoes tossed with olive oil and parsley. Joe particularly liked the crunch of the Panko breadcrumbs, and I liked how the nuttiness of the walnuts complimented the mild fish.

Walnut-Encrusted Tilapia
adapted from Joelen's Nutty Tilapia

Ingredients:
- 4 frozen tilapia fillets
- 1-2 eggs
- 1 tablespoon water
- 1/2 cup crushed walnuts (I put some in a plastic bag and crushed it with a rolling pin.)
- 1/2 cup panko breadcrumbs
- salt & pepper to taste

Directions:
In a small bowl, whisk eggs with water for egg wash.
In a shallow baking pan, combine the nuts, breadcrumbs, salt & pepper.
Dip each tilapia fillet in the eggwash and dredge in the nut/breadcrumb mixture until fully coated.
Plate coated fish on a plate and chill for 10-15 minutes.
Meanwhile, preheat your oven to 375 degrees.
Place coated fish on a light greased baking sheet and bake in preheated oven for 15-20 minutes.